A DIY Guide to Dragon Eggs
  • Tutorials
  • About
  • Gallery
  • Social Media
    • @RTNailArt on Instagram
    • @NailsLikeLace on Instagram

Dragon Egg Tutorial

12/16/2014

8 Comments


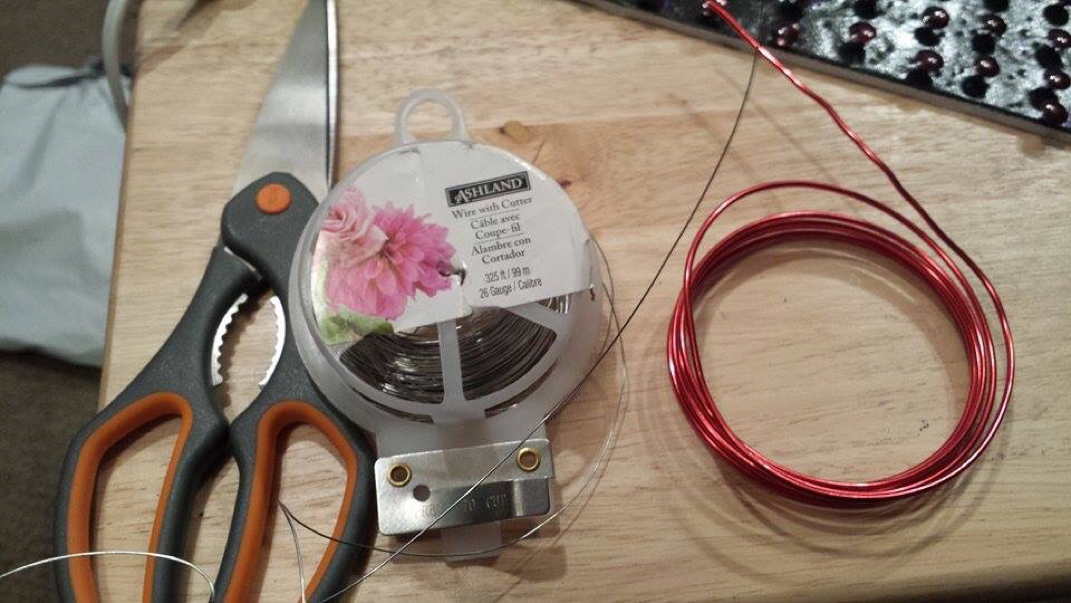
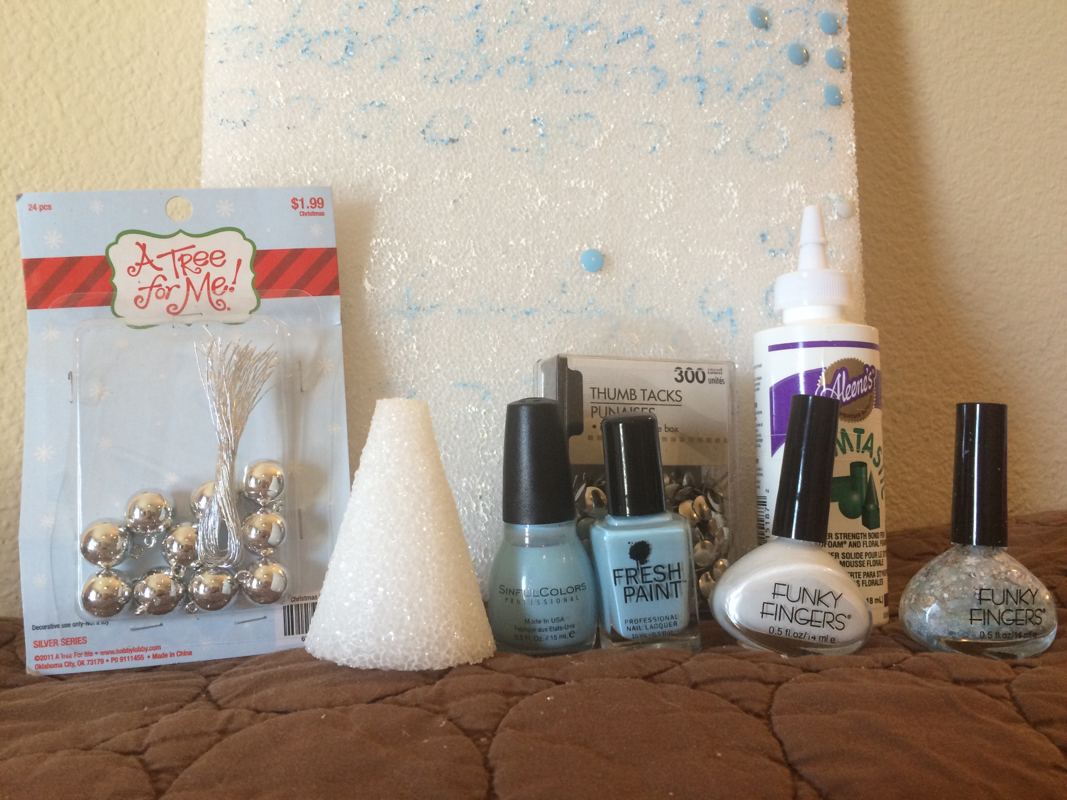
The first thing you need to do is gather your materials. You will need the following items:

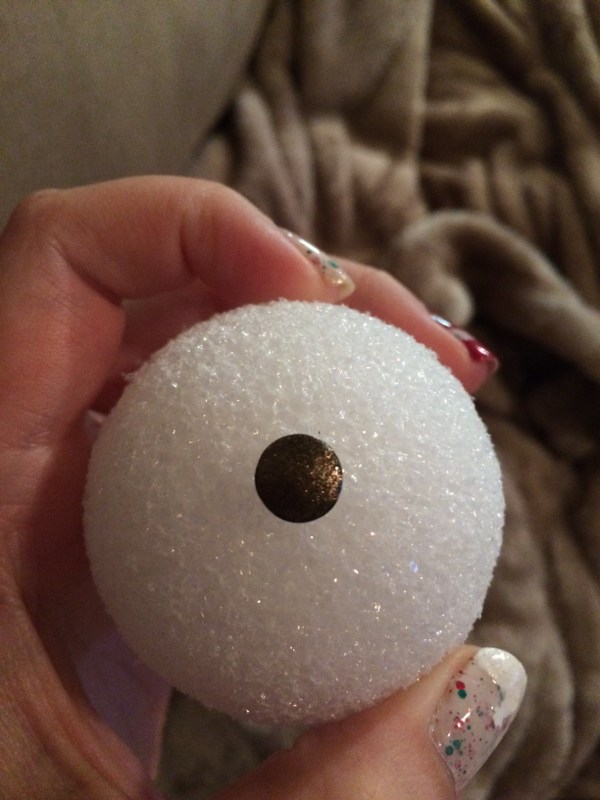
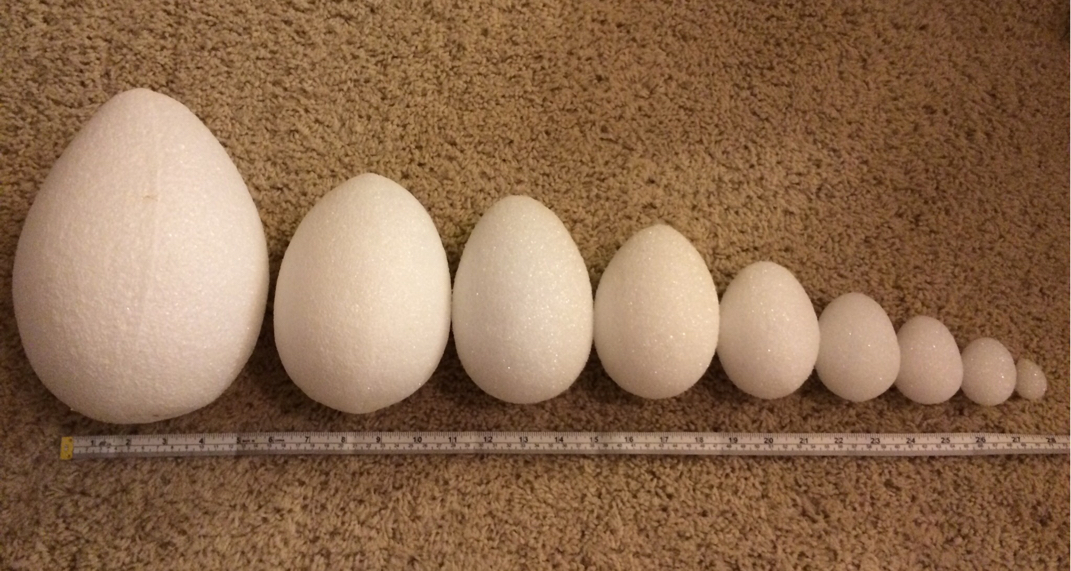
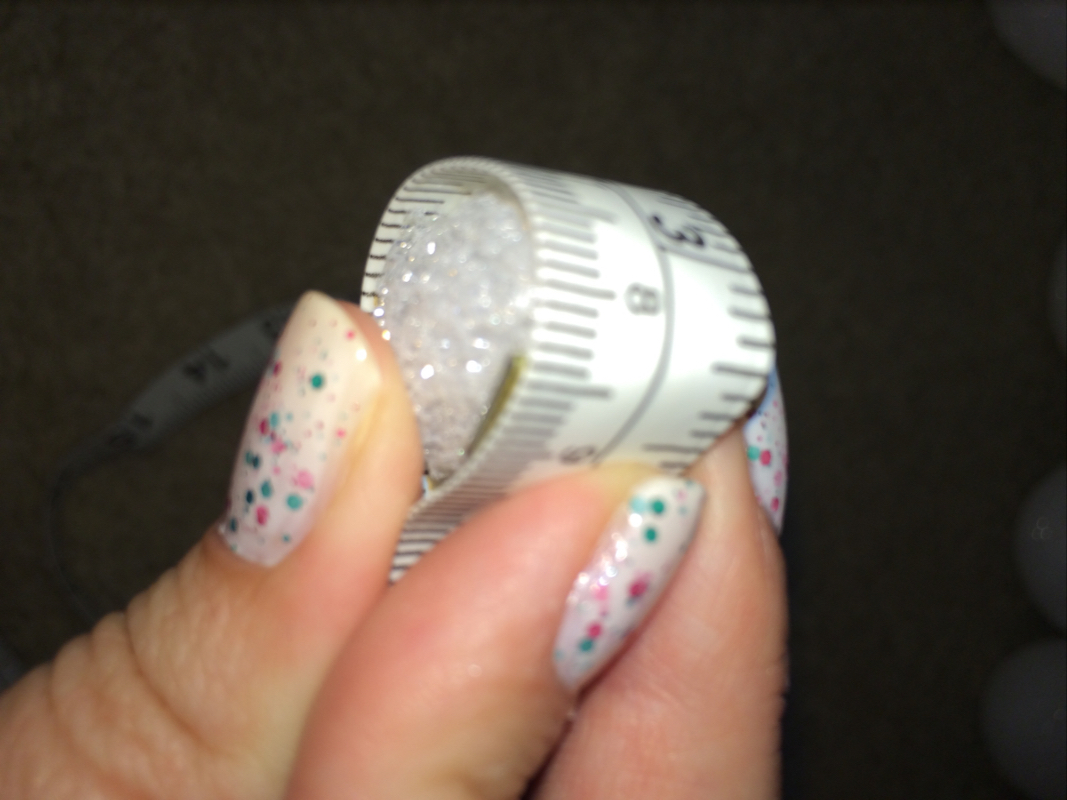
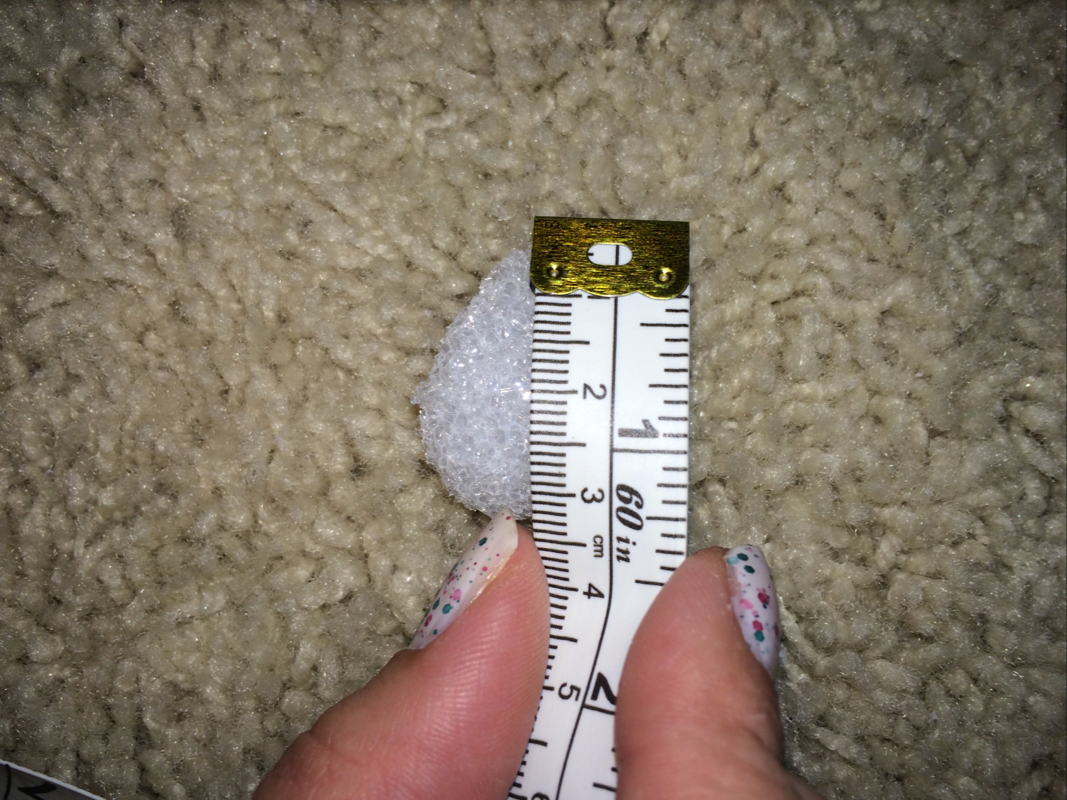
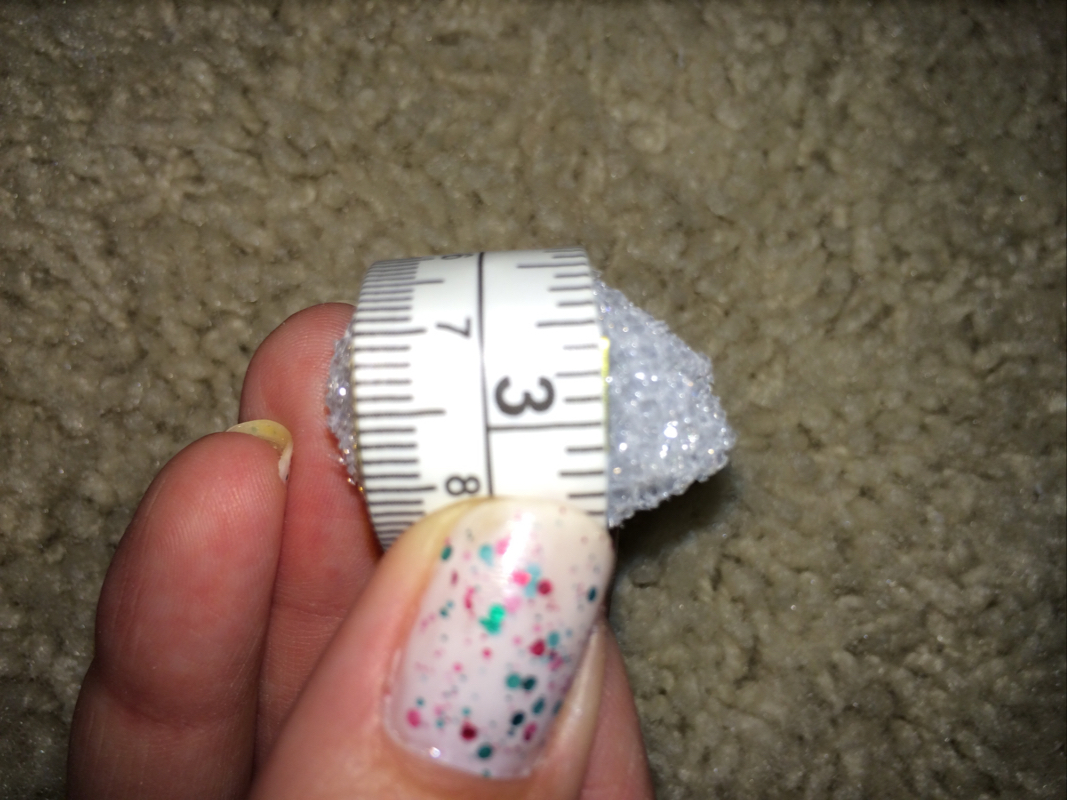
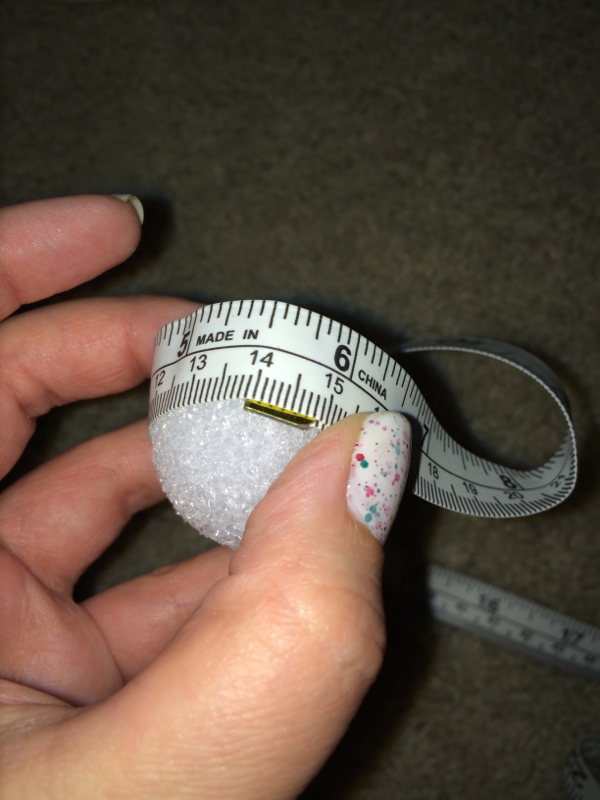
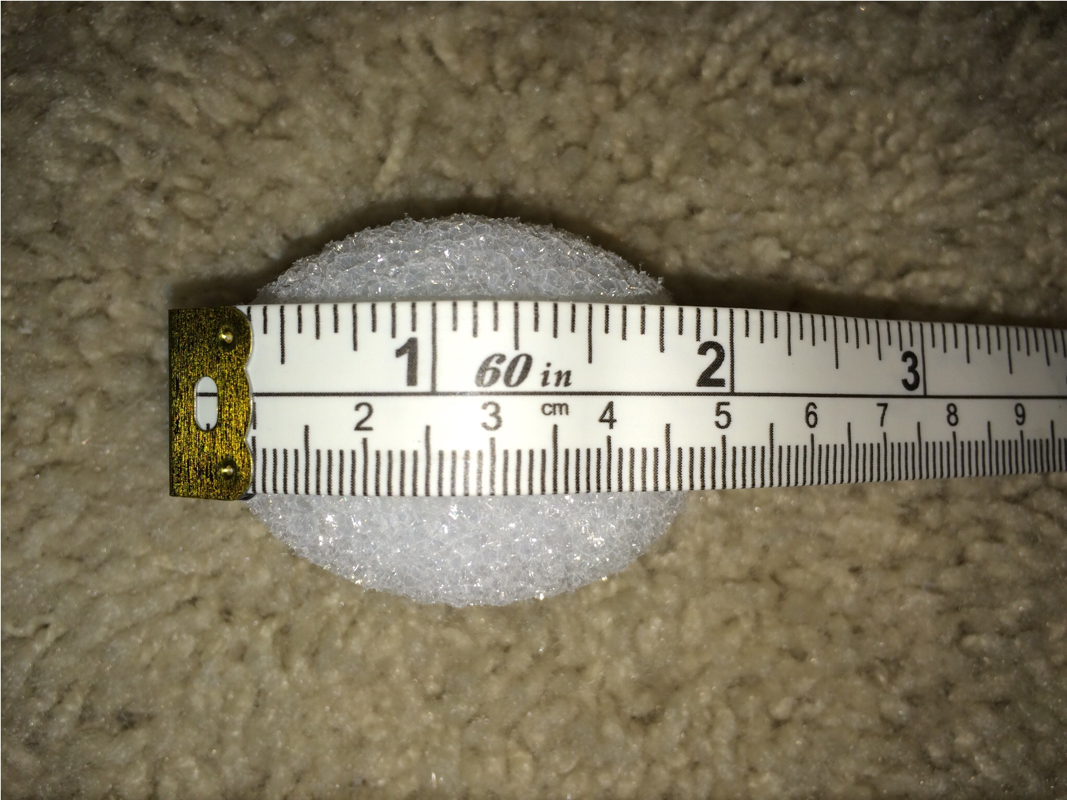
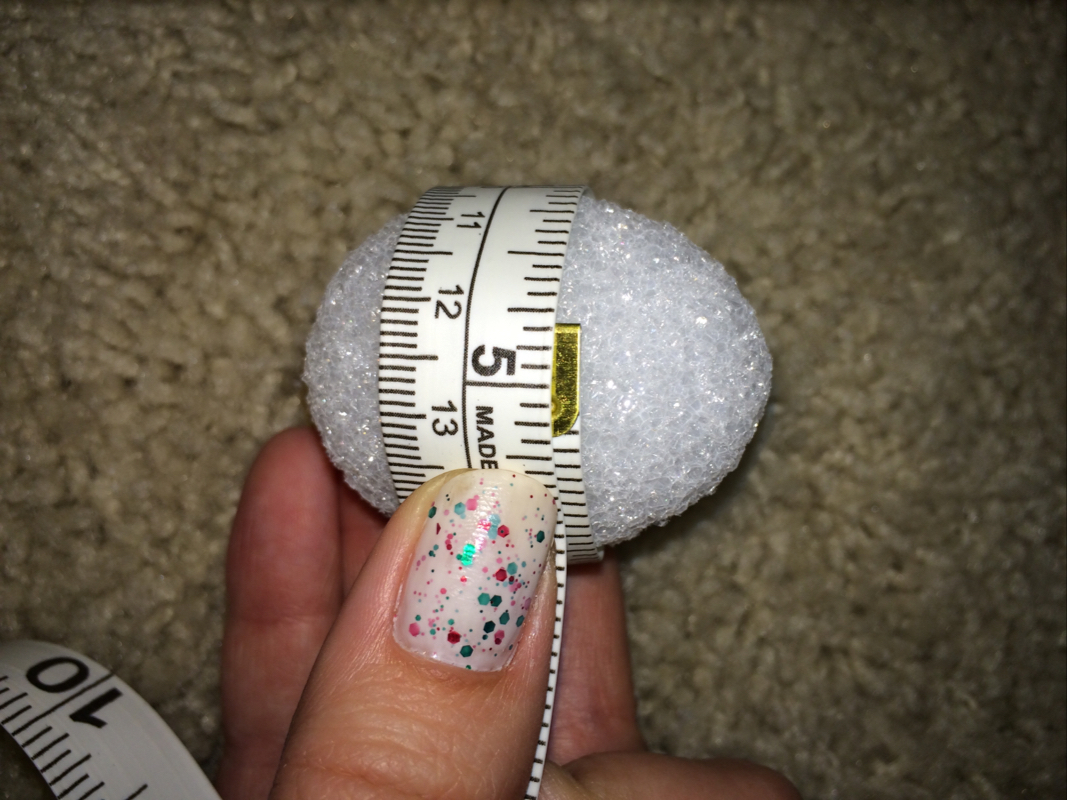
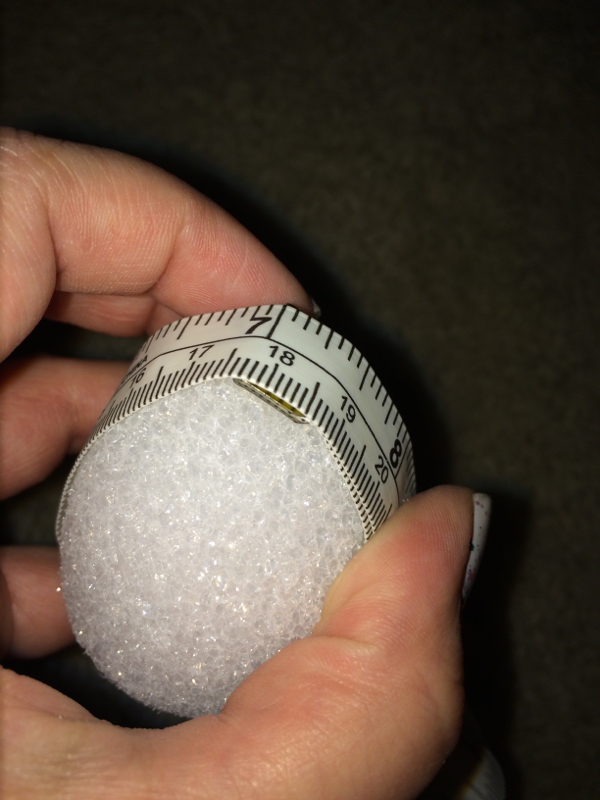
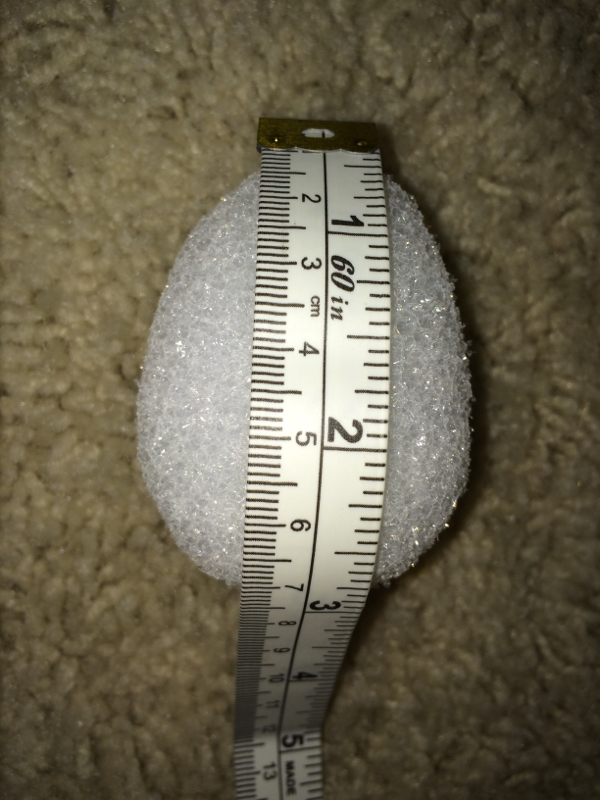
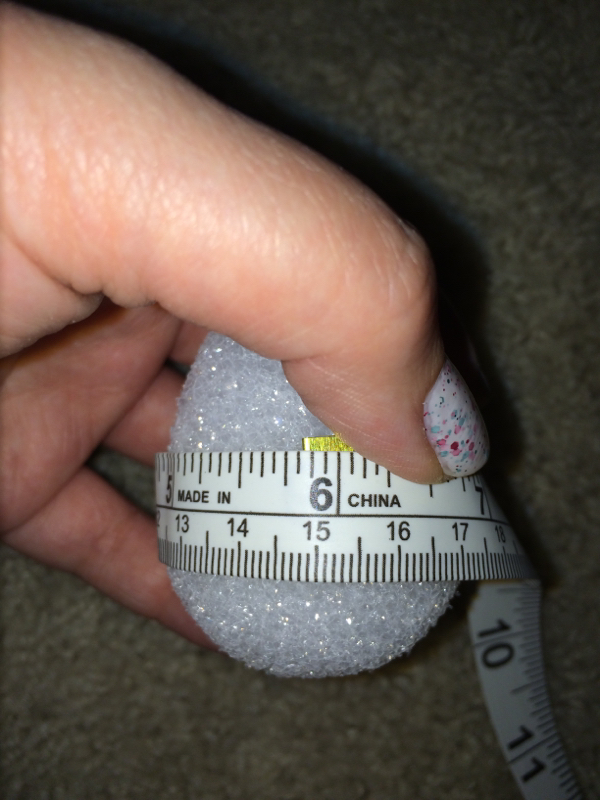
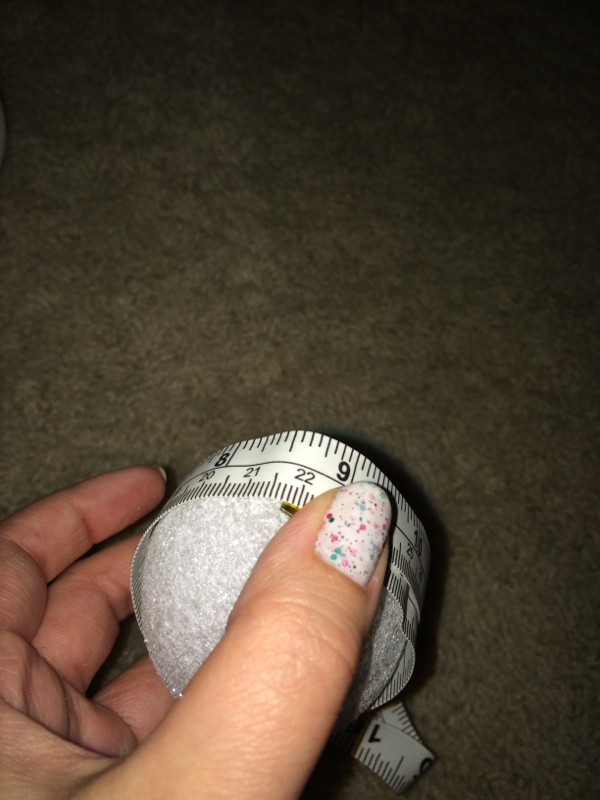
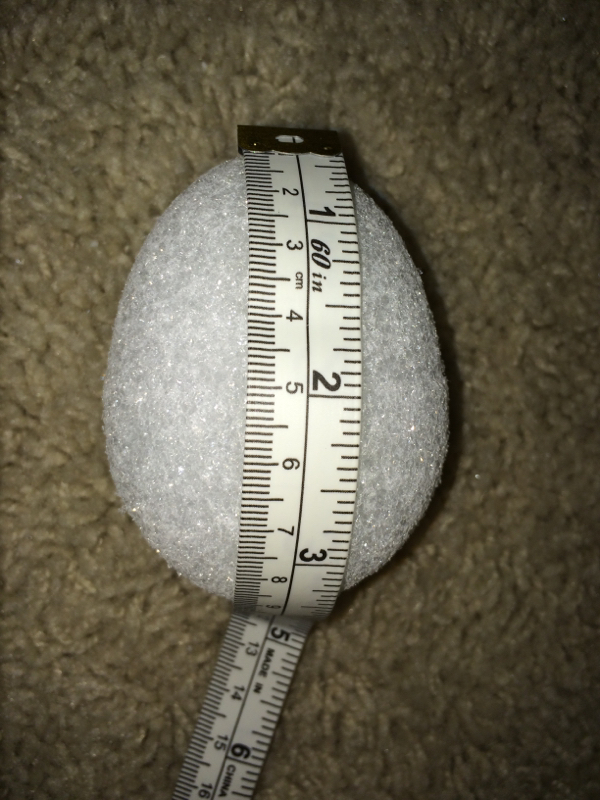
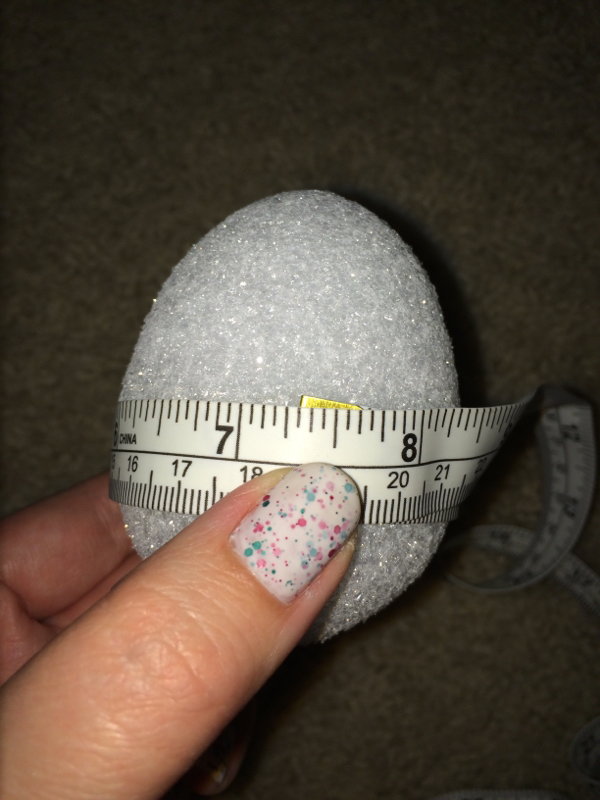
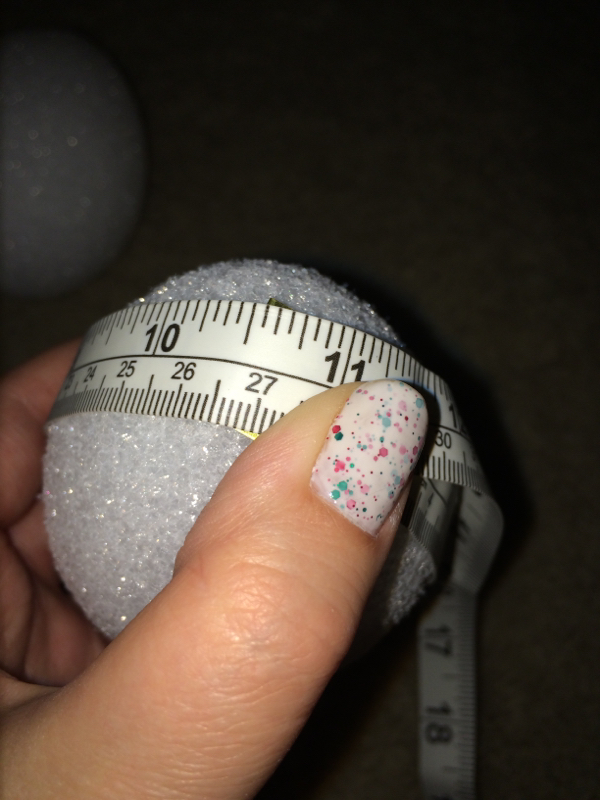
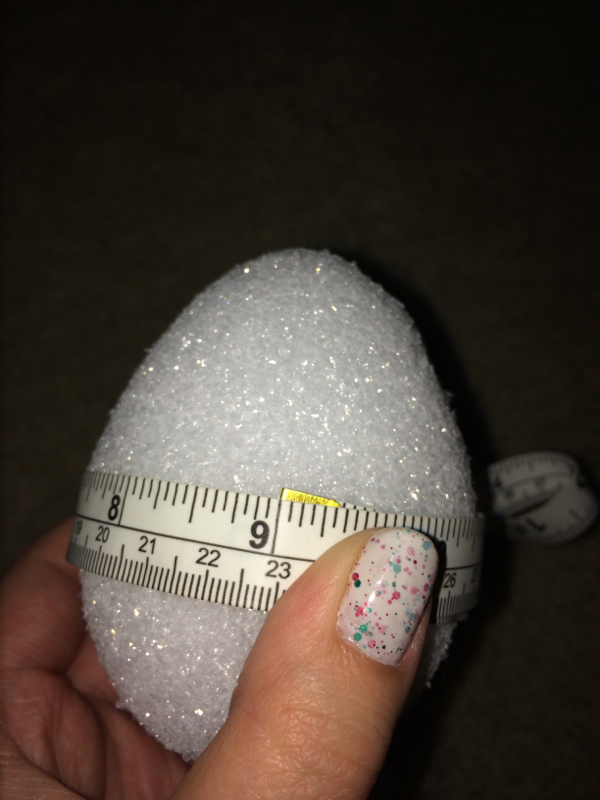
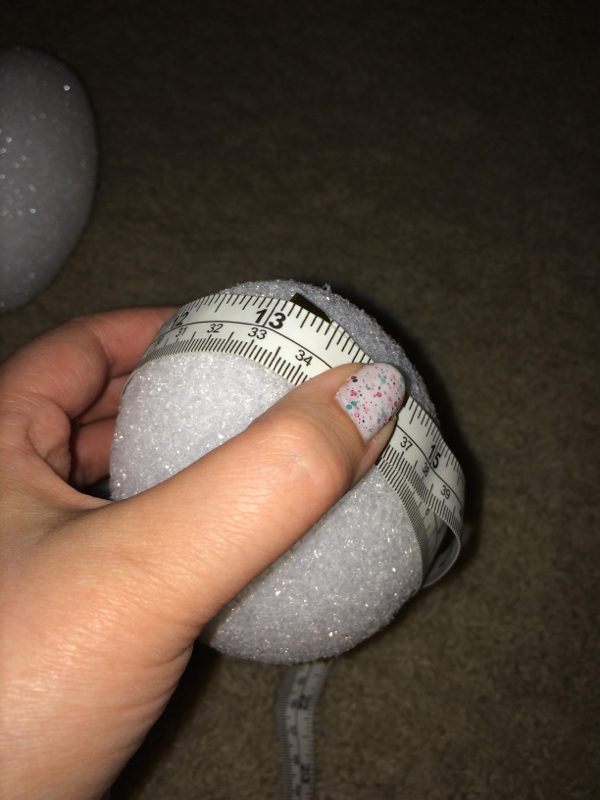
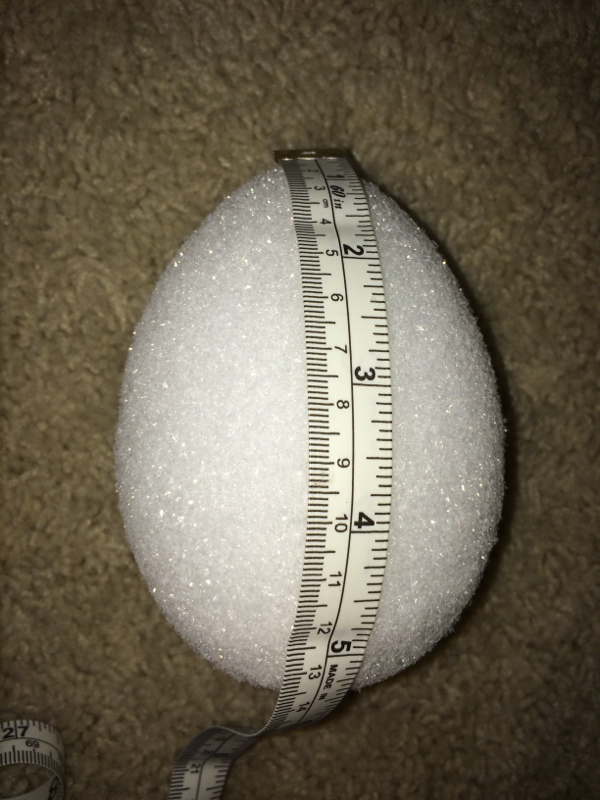
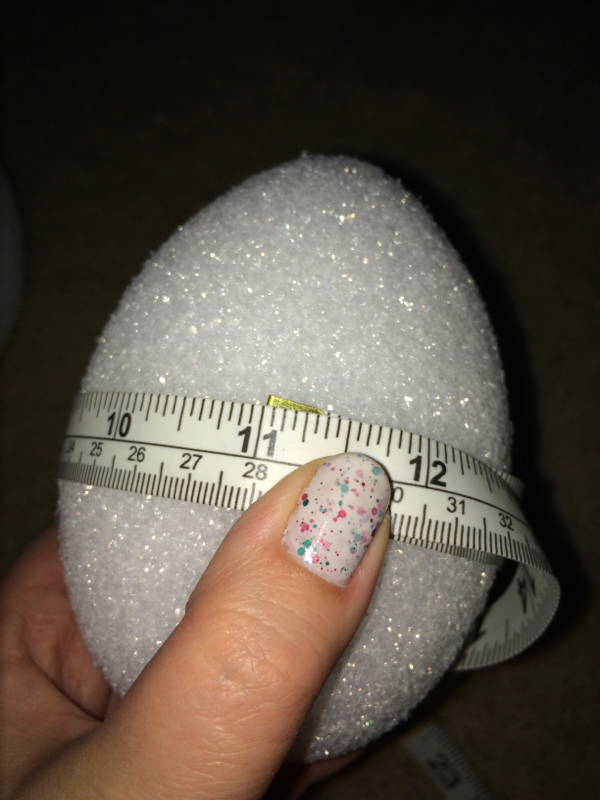
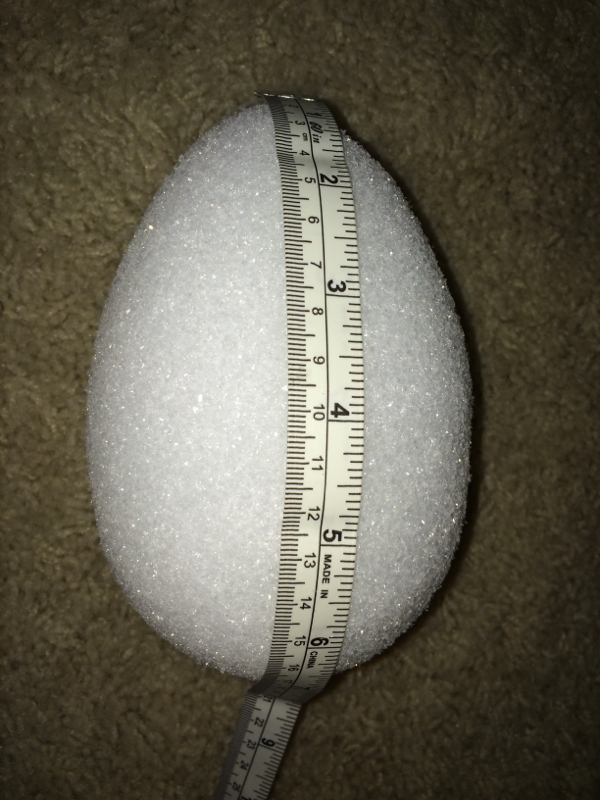
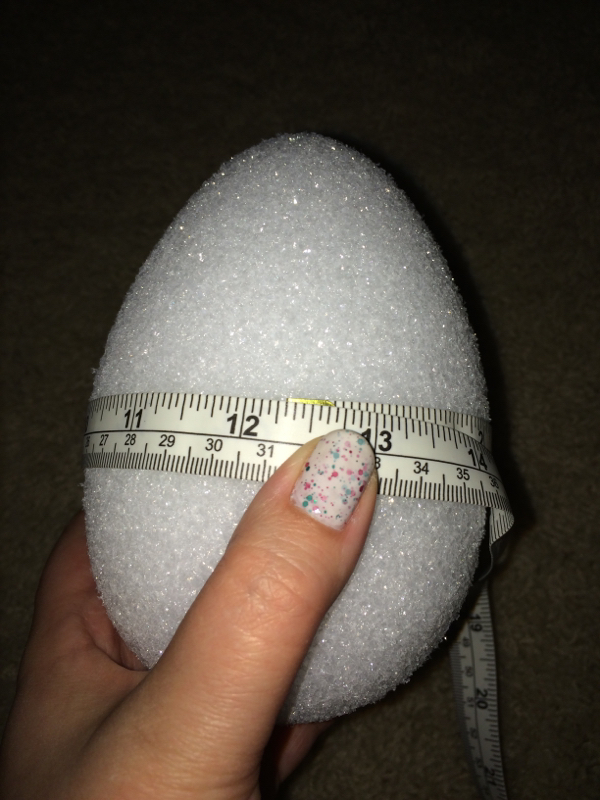
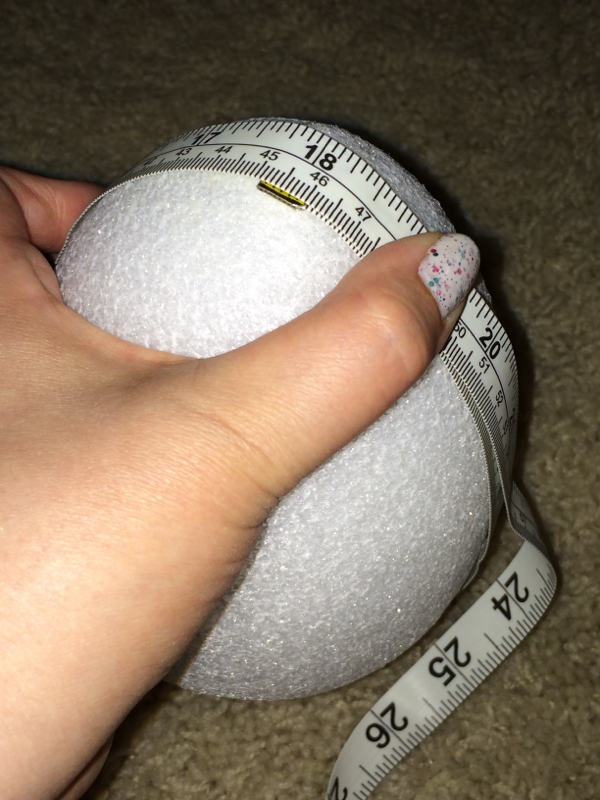
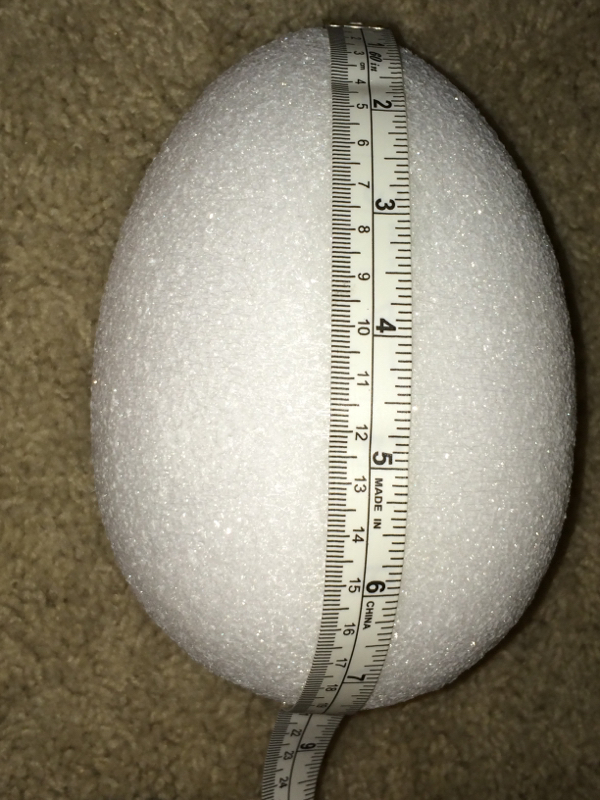
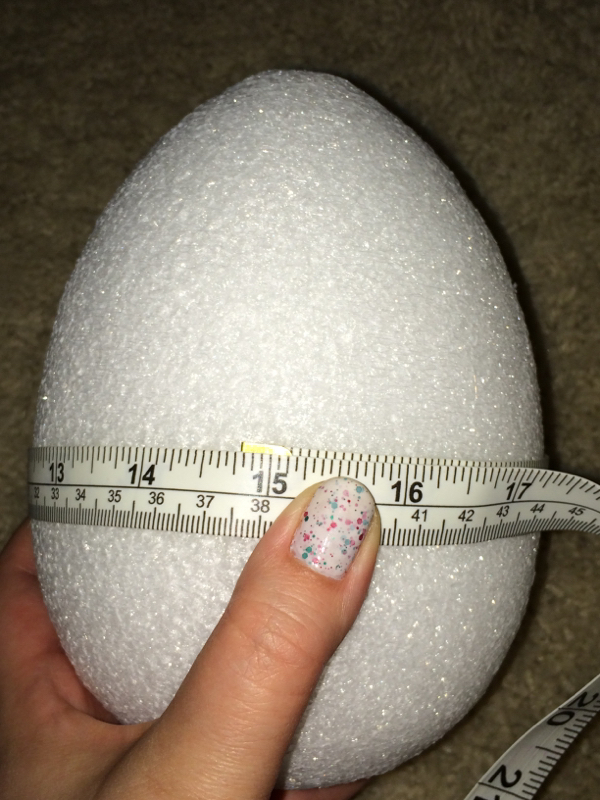
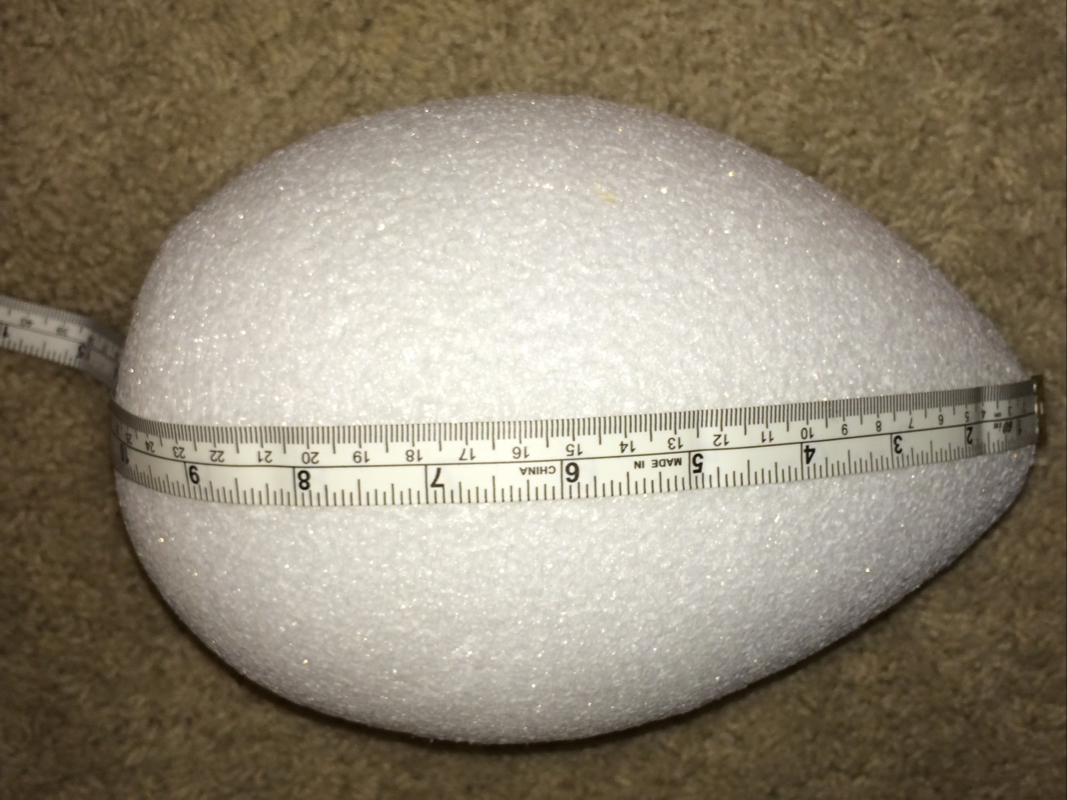
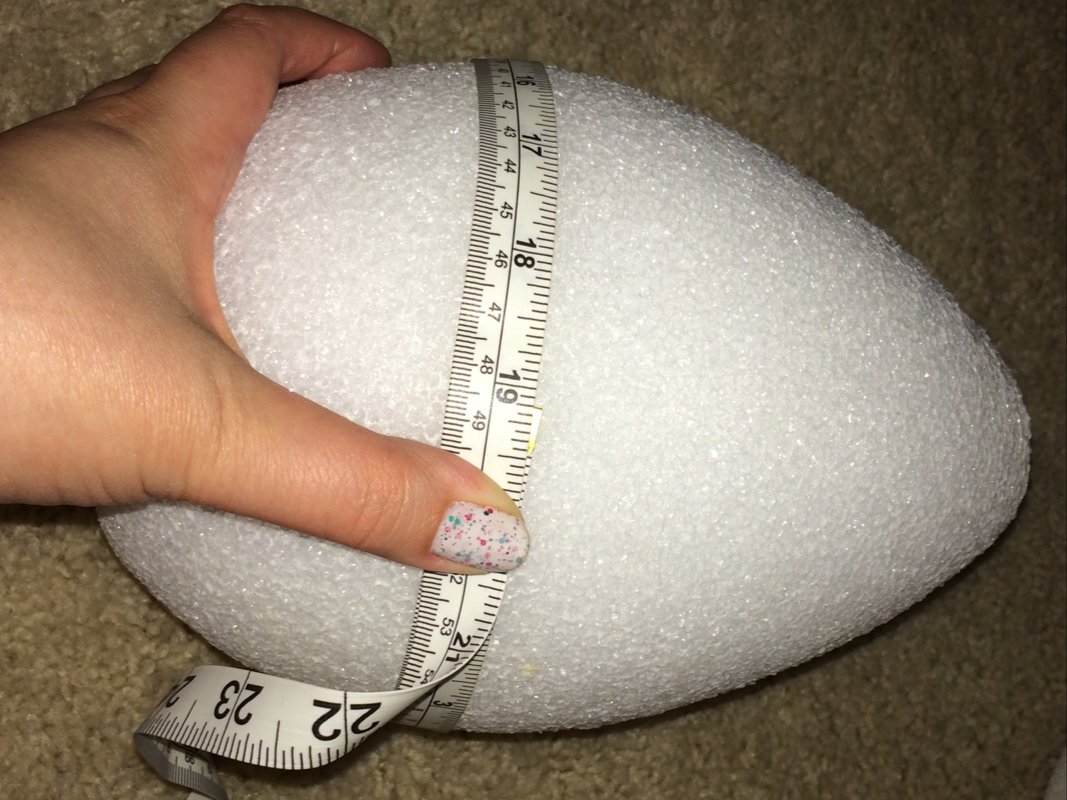
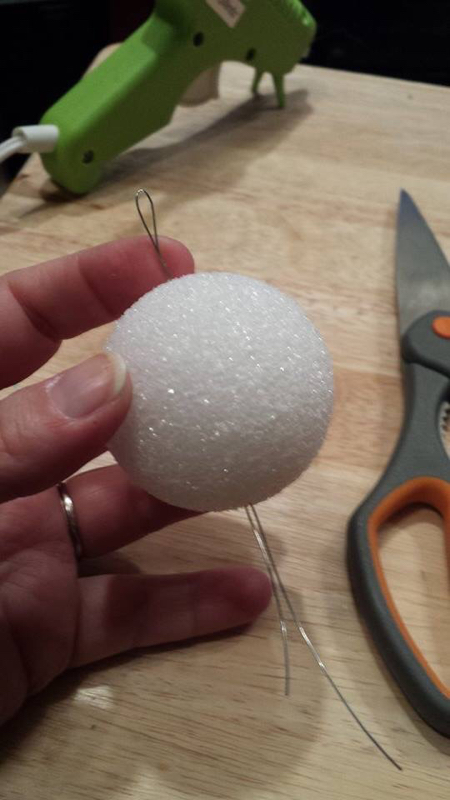
  • a styrofoam egg (see here for discussion on different sizes)
  • thumb tacks (see here for tack estimates)
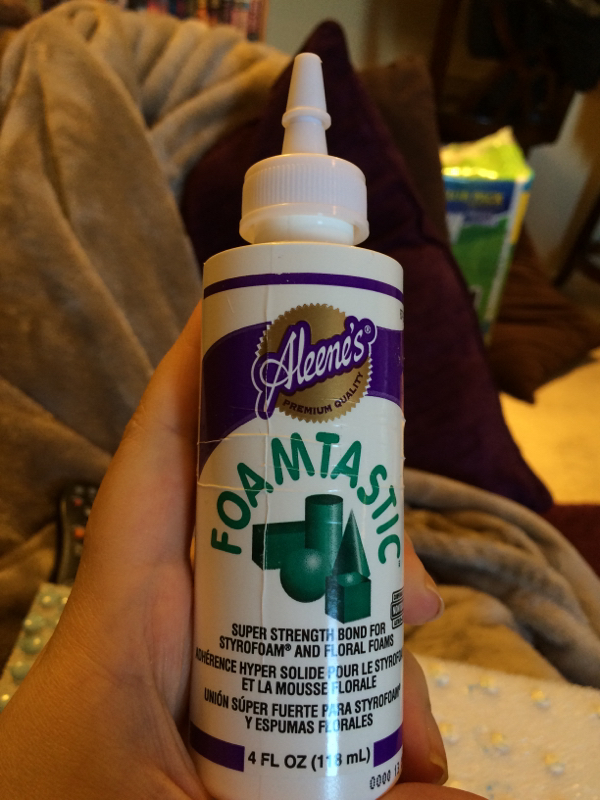
  • some kind of glue (foam glue, super glue, hot glue, etc). In a pinch, clear nail polish with substitute.
  • something to stick the tacks into for painting (see ideas here)
  • desired nail polish colors
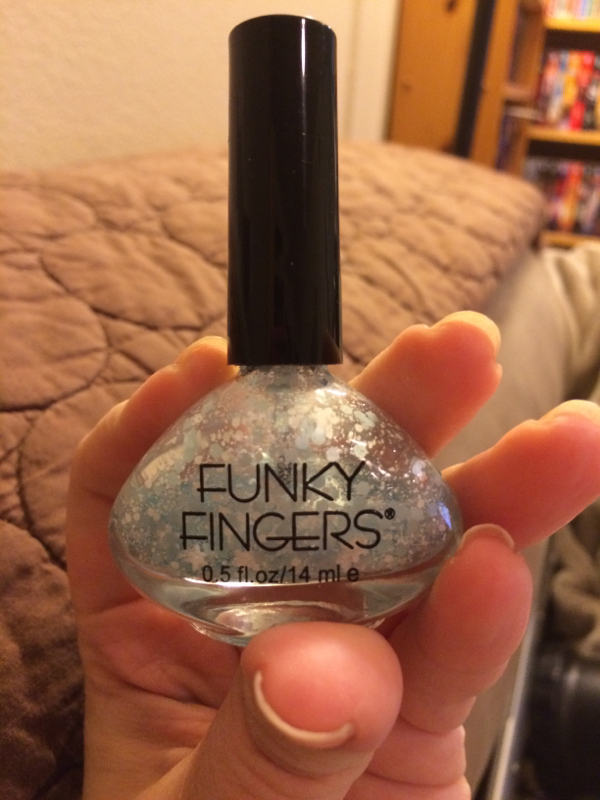
  • clear nail polish for a shiny top coat

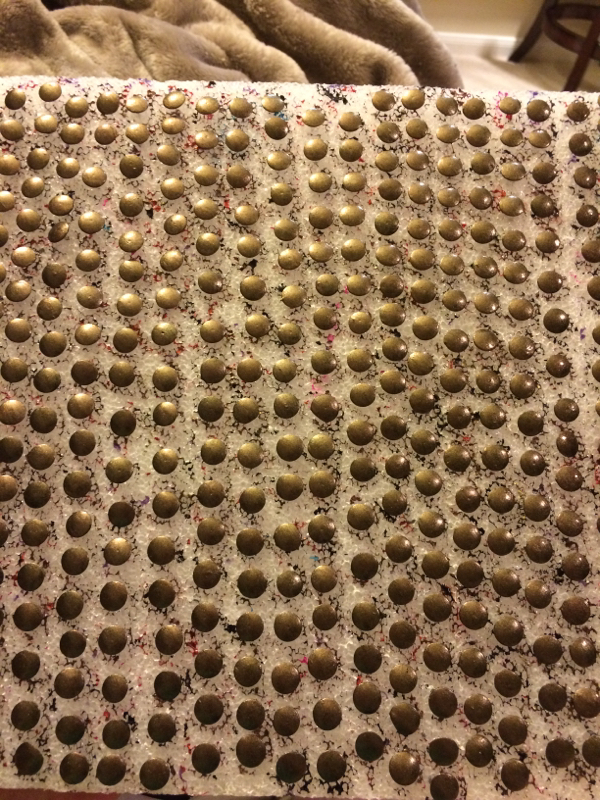
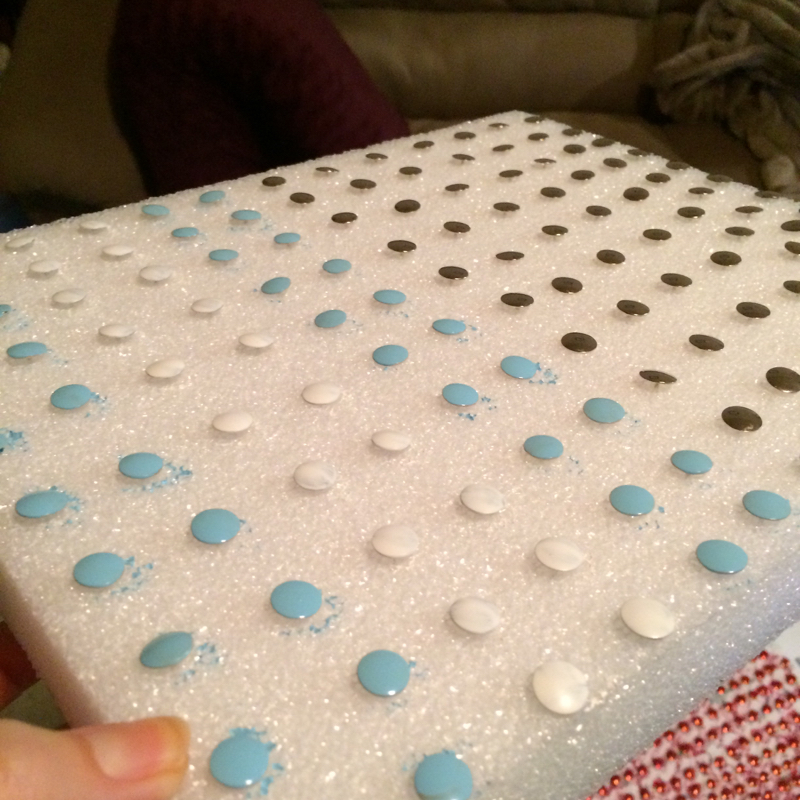
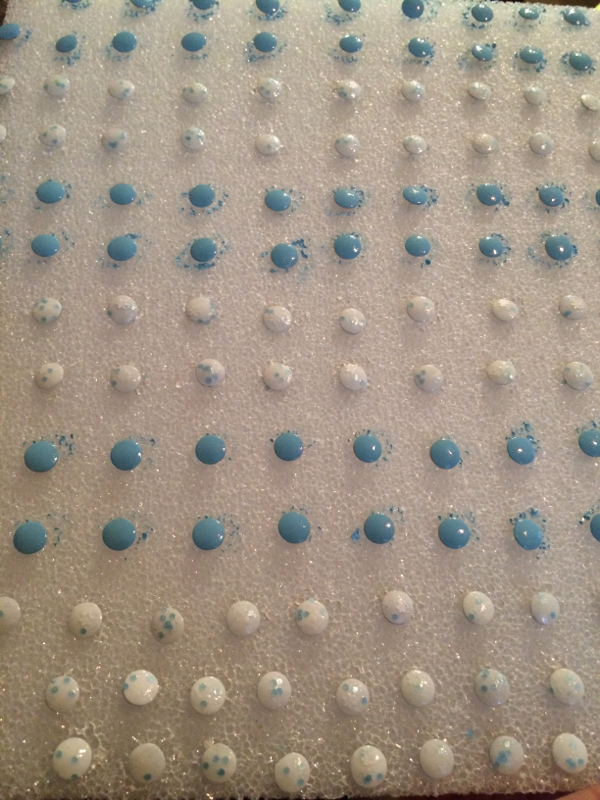
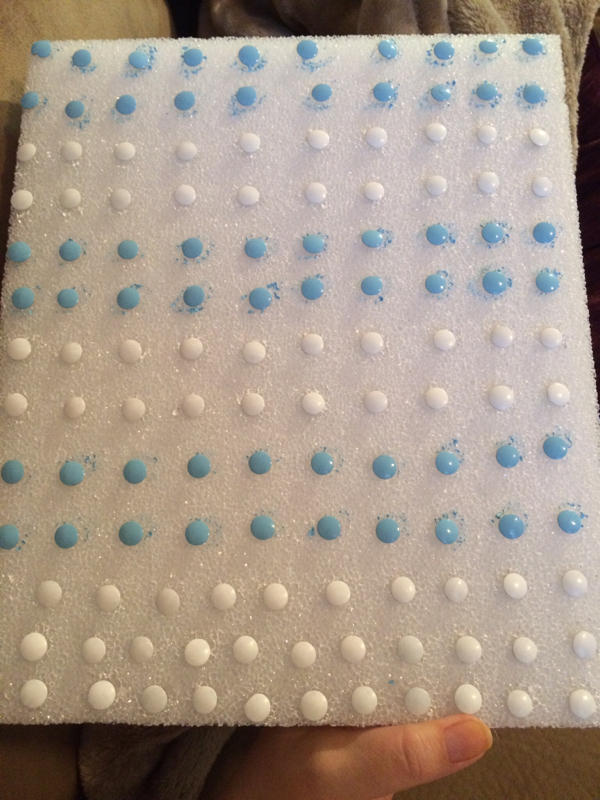
Once you've gathered your materials, the first step will be to place your tacks for painting. Placing the tacks in lines will help you keep better track of which tacks have already been painted, which is especially important when you get to the final clear coat of polish.

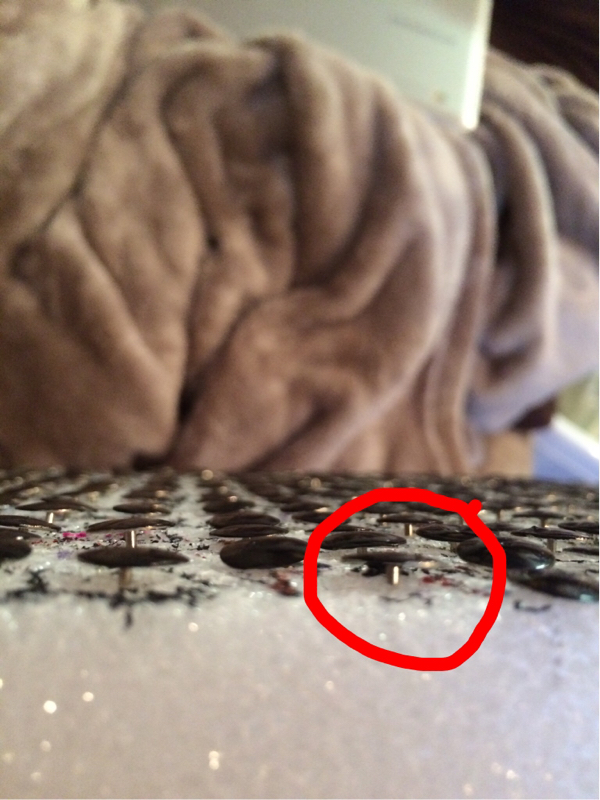
As you can see, I used a styrofoam board for my tacks.

Picture
Picture

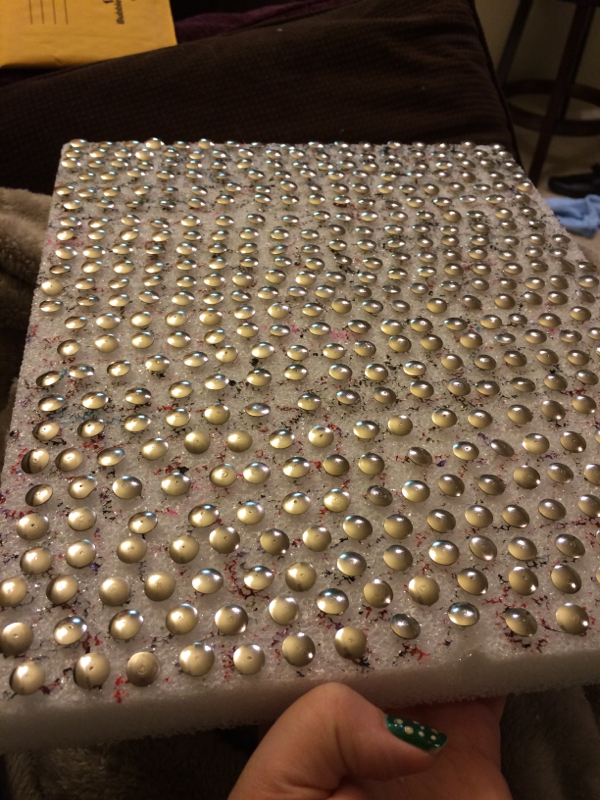
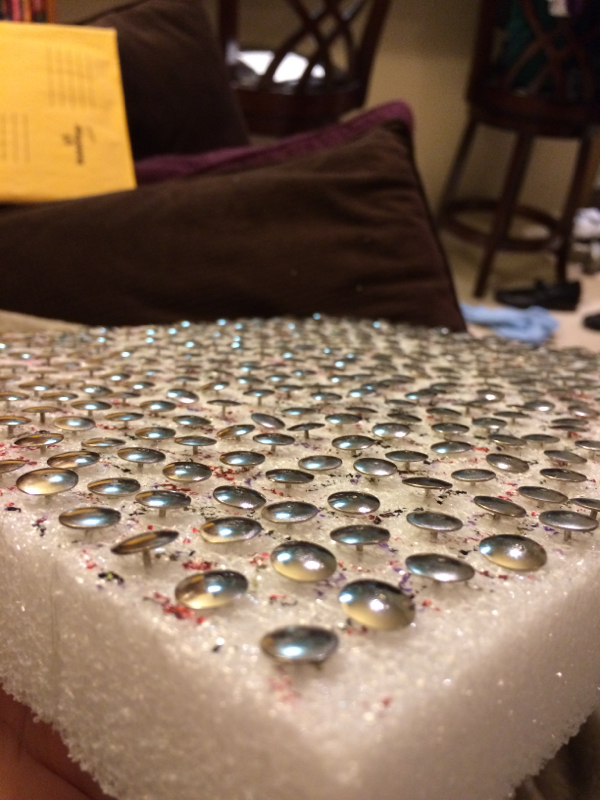
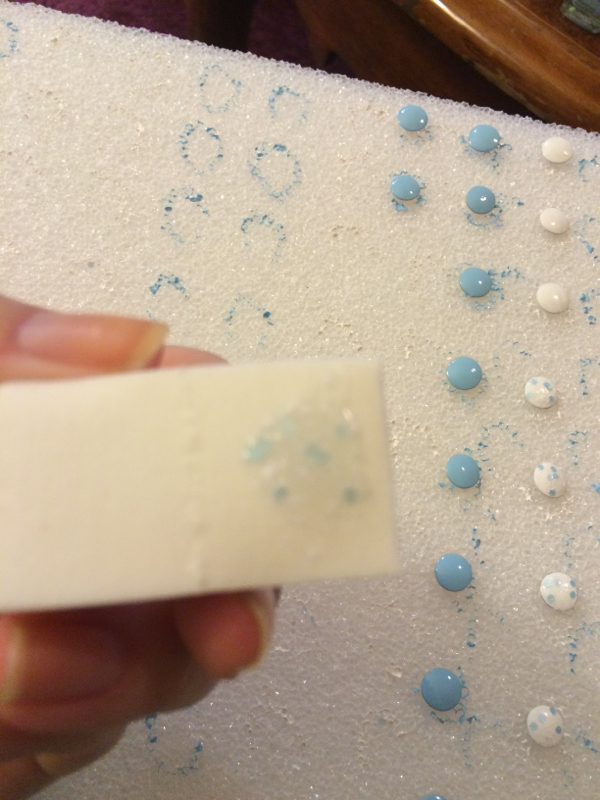
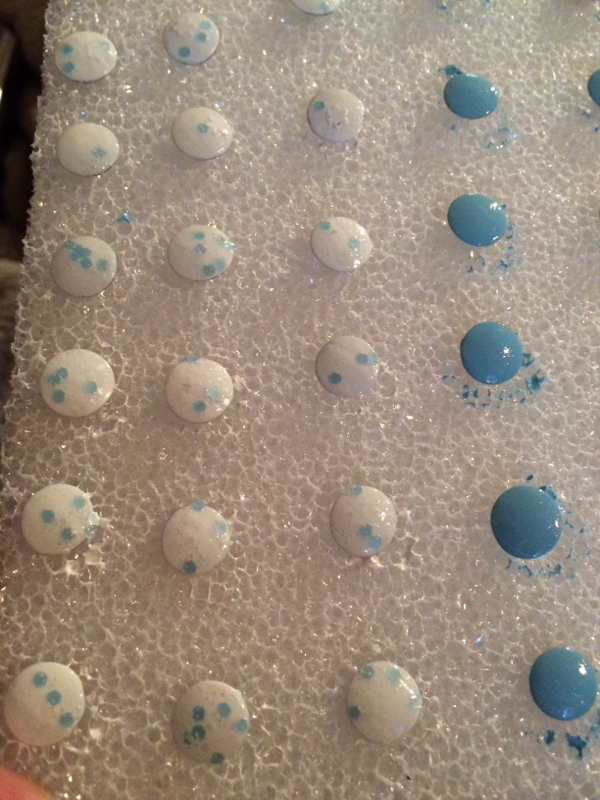
Make sure the tacks aren't pushed all the way into the board, so you will be able to paint their edges.

Picture

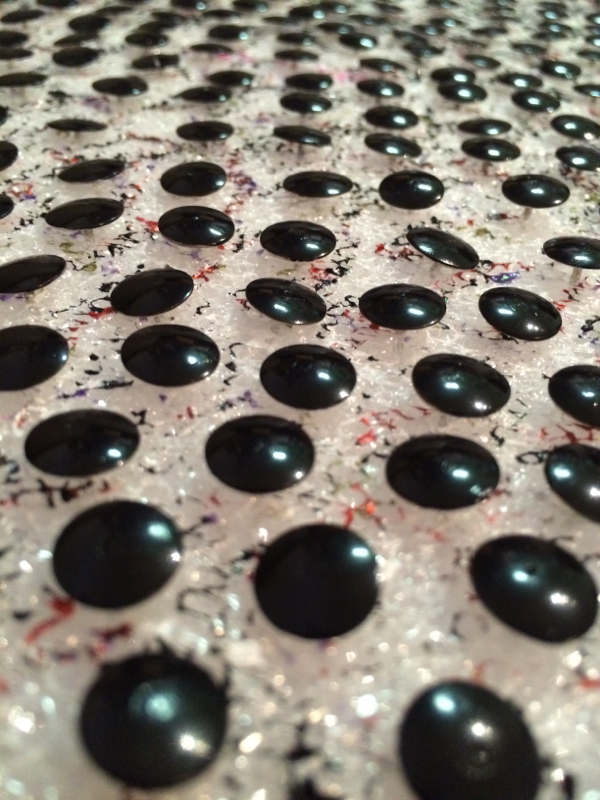
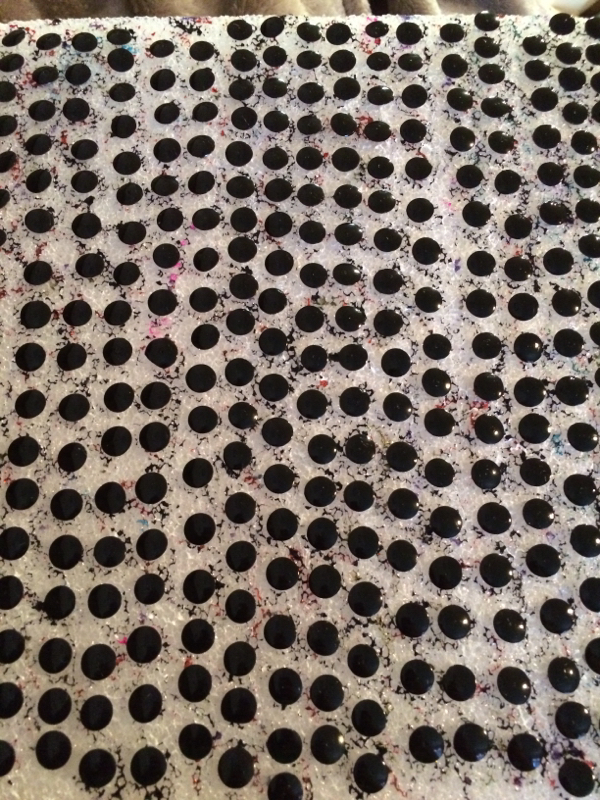
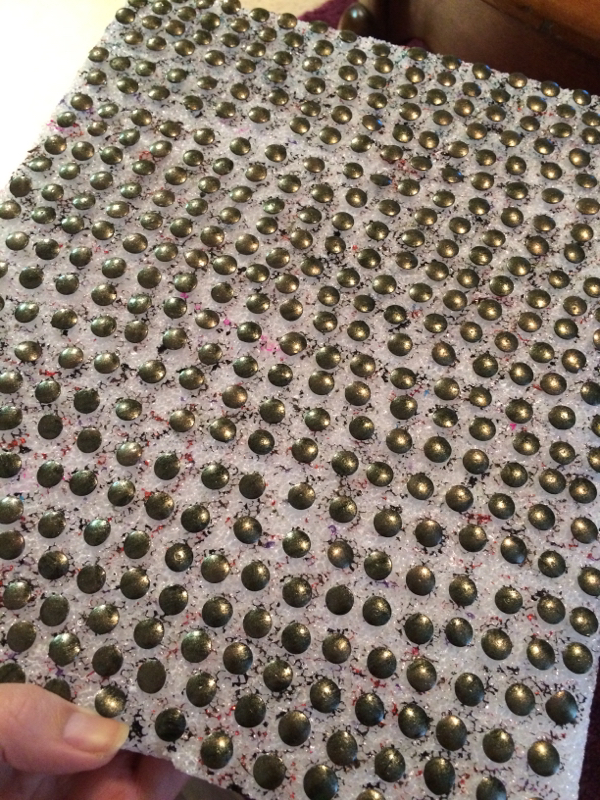
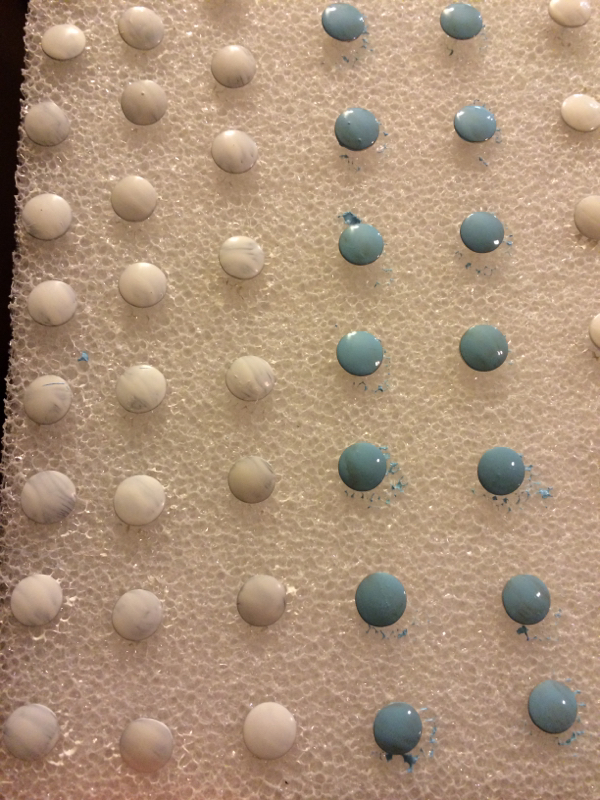
I always start by painting my tacks with a base color. This helps both with making sure th edges get painted and masking he underlying color of the tack. Since I plan to use a darker color later, I used black as my base coat.

When using white for a base coat, you may need two coats before it is opaque. Patchy base colors lead to the finished tacks not being uniform in color.

Picture
Picture

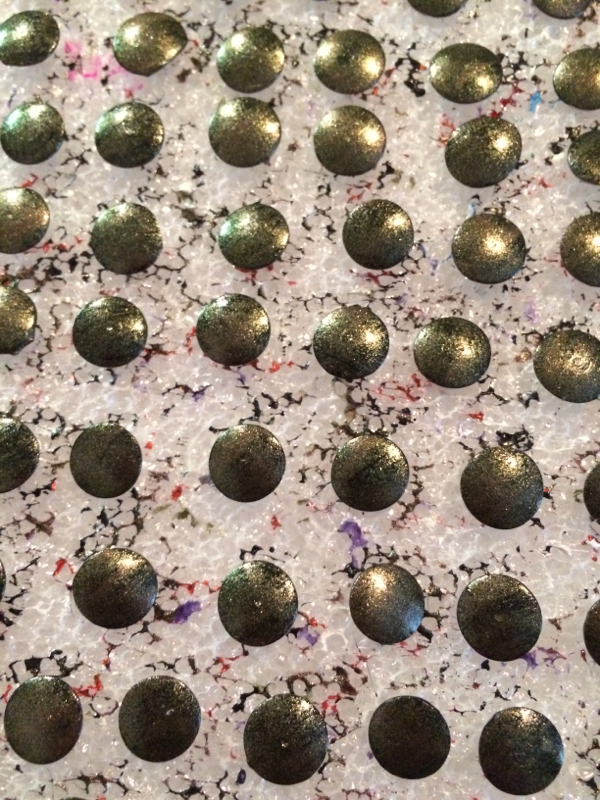
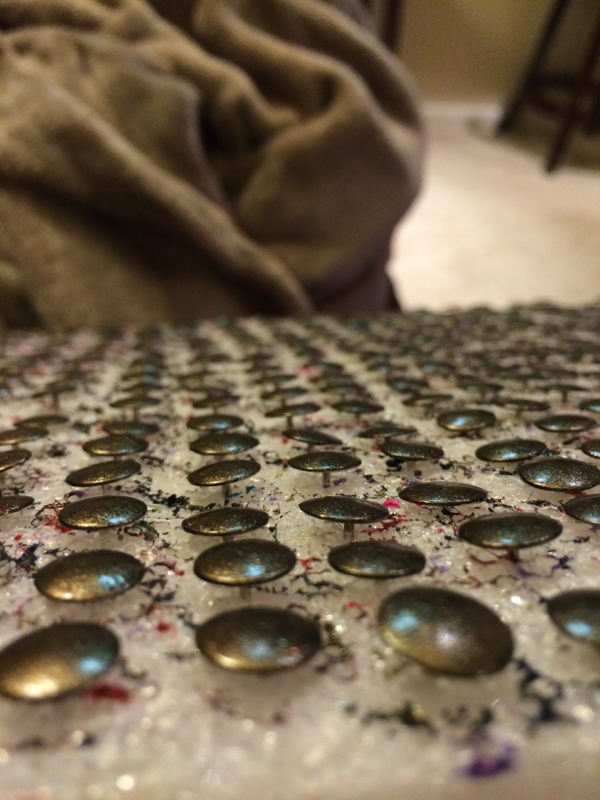
This tack is a good example of one that the edge didn't get painted. On the finished egg, tacks like these will be noticeable, so you may want to check for them and repaint them before going on to the next step.

Picture

Next, I paint one coat of my color. As you can see, the black base is still peaking through. I will need at least two layers of the color for this egg. Depending on the opaqucy of your polish, you may need several coats.

Picture
Picture
Picture

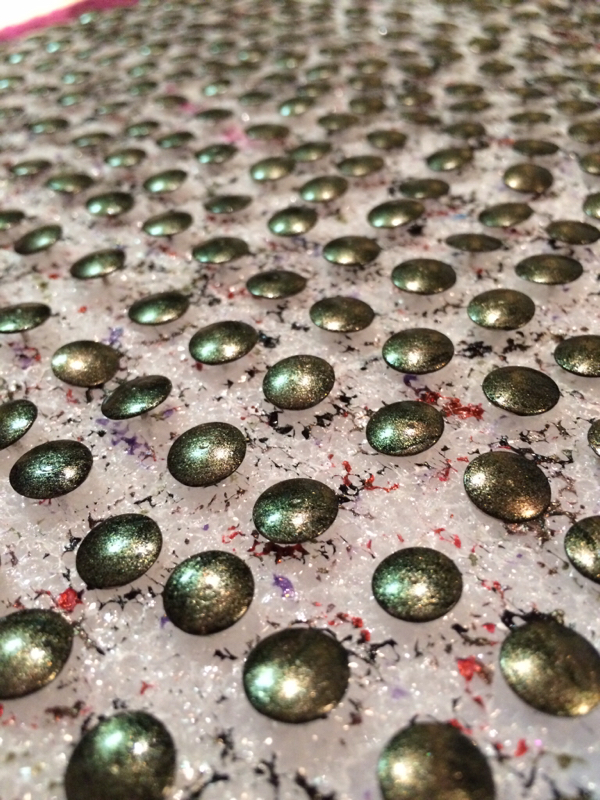
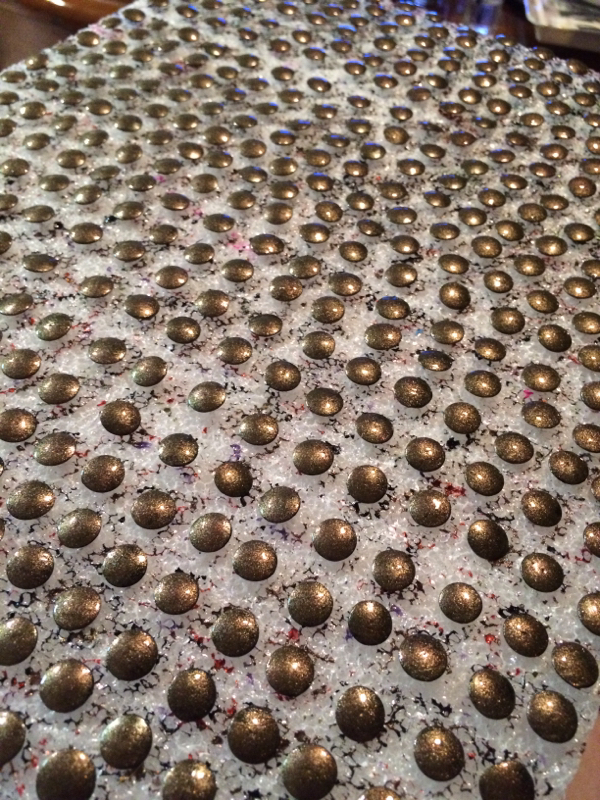
After two coats of my color, you no longer see bits of the black base coat.

Picture
Picture
Picture

If I were using a glitter, this is the point where I would add a coat of glitter polish.

Since my color is pretty enough by itself, I'm just going to use a clear top coat to give it an extra shine and help prevent the polish from chipping.

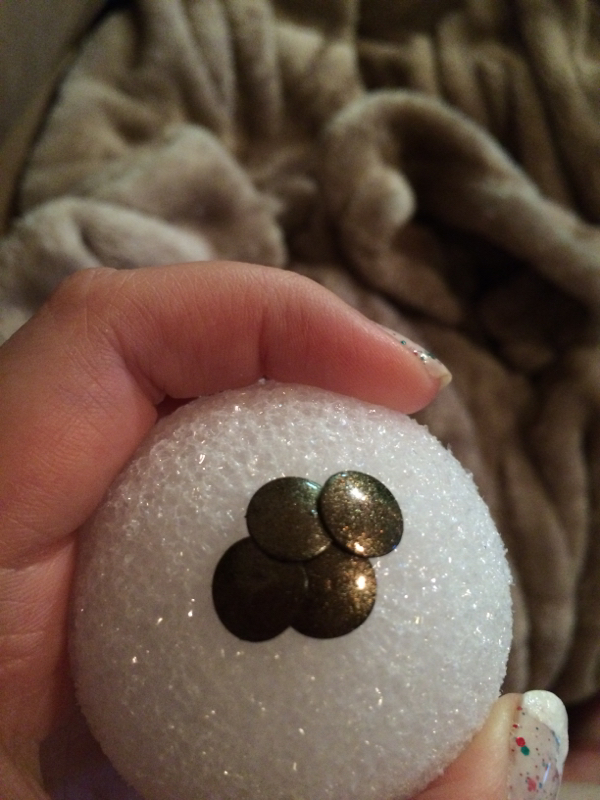
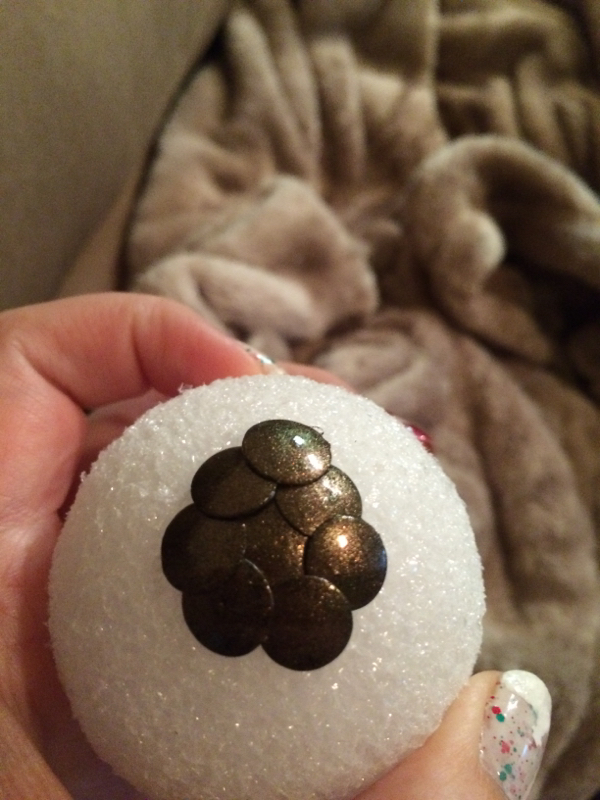
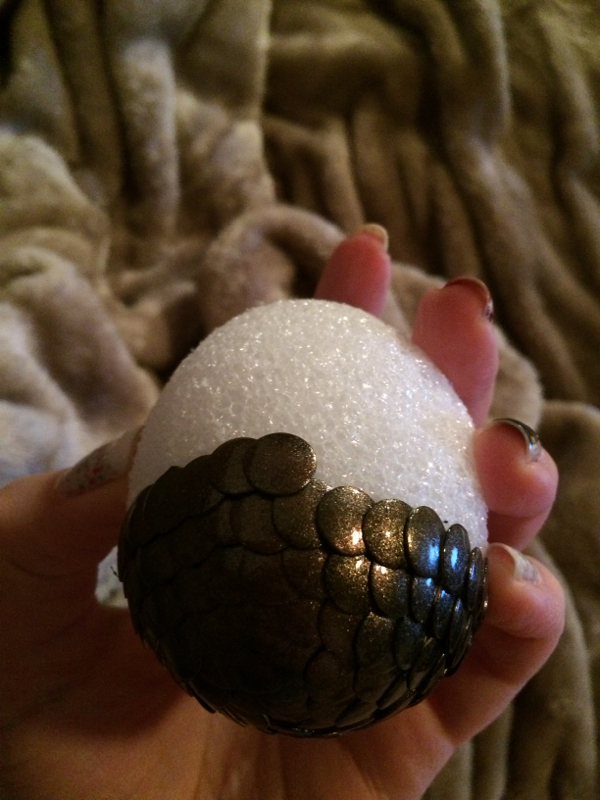
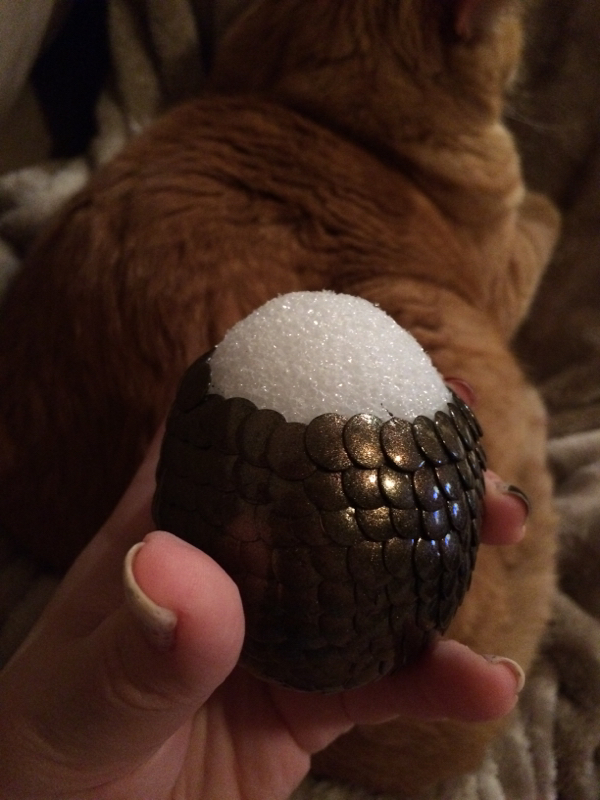
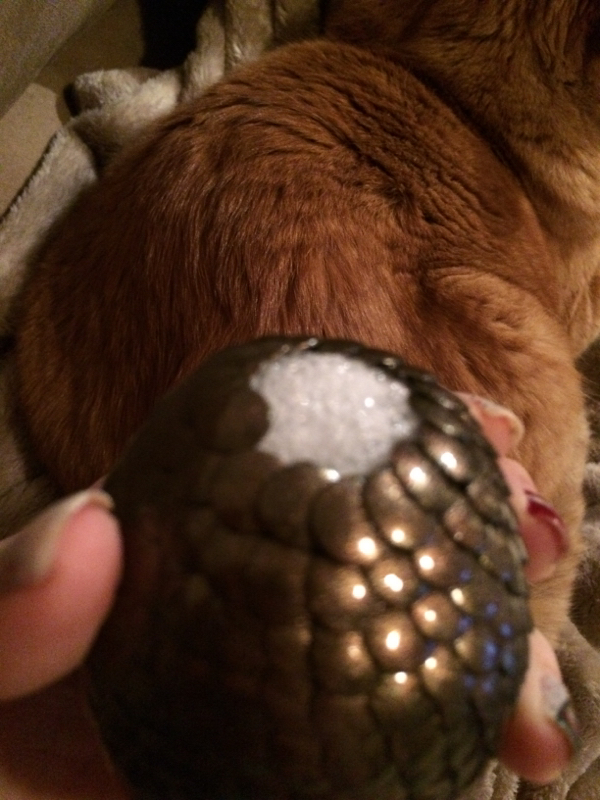
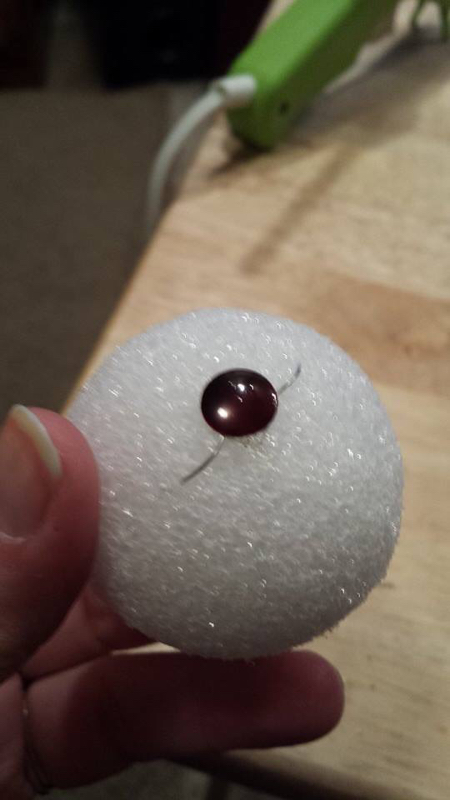
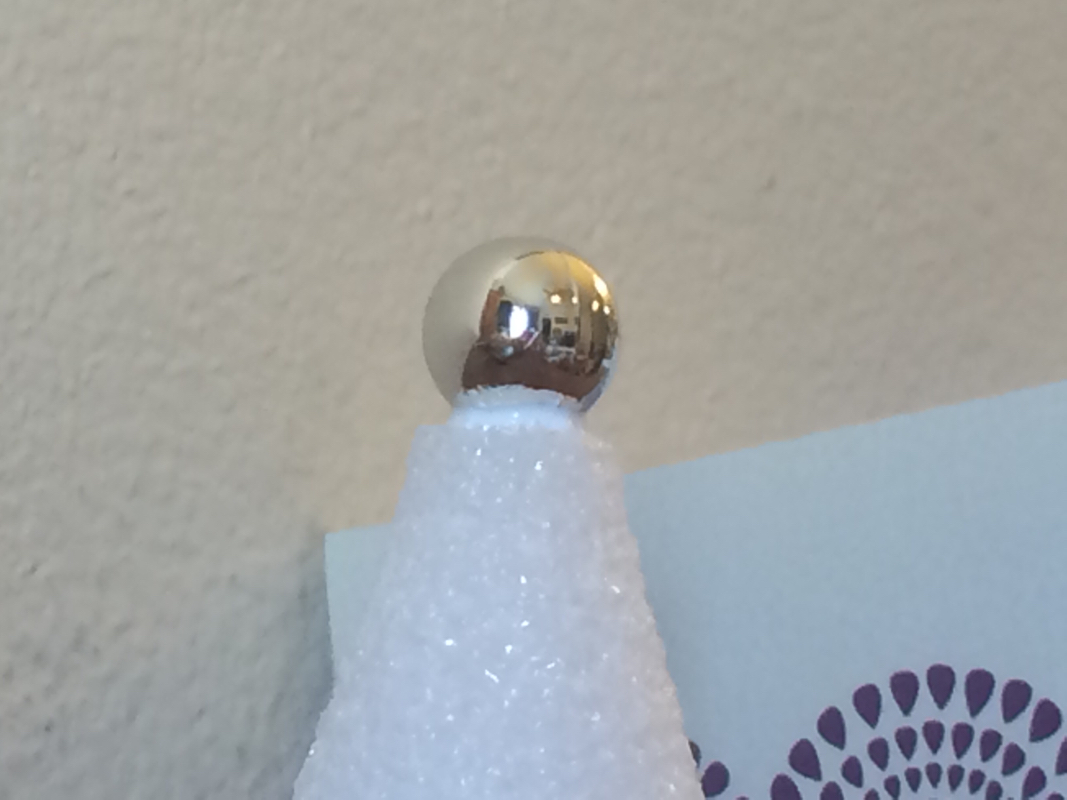
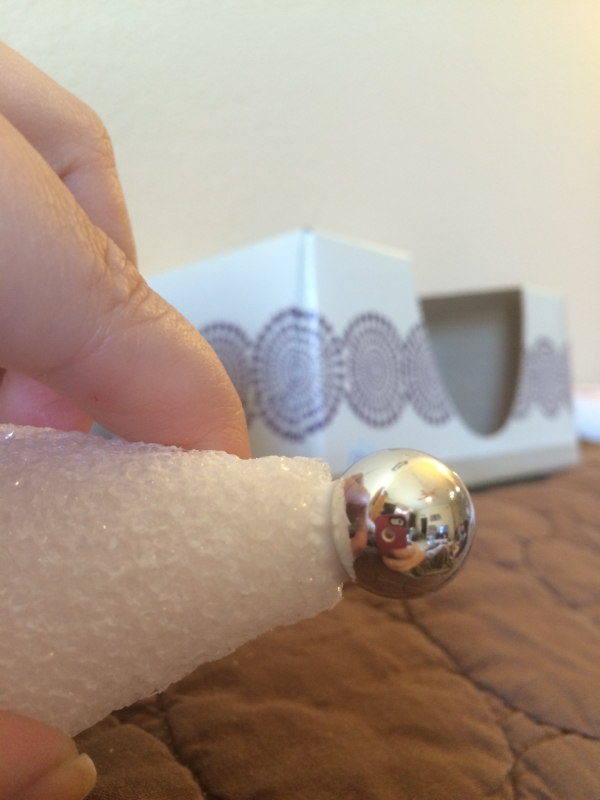
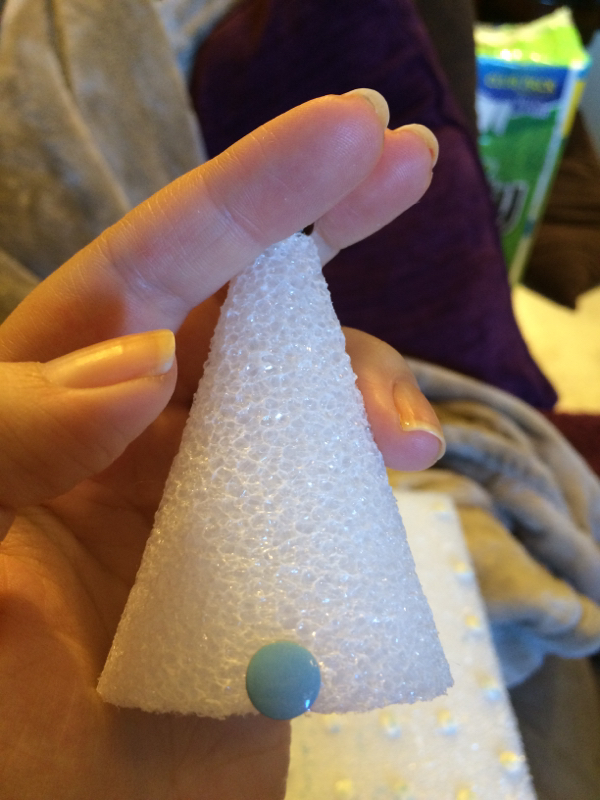
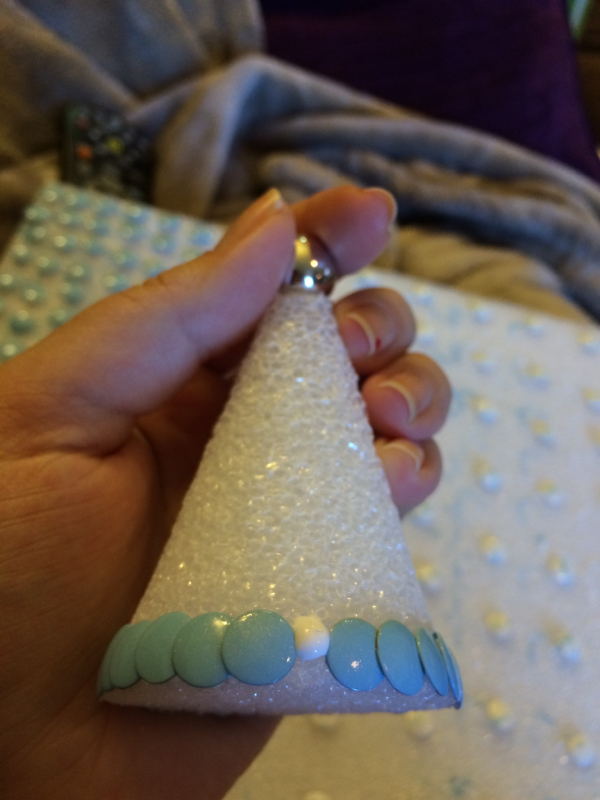
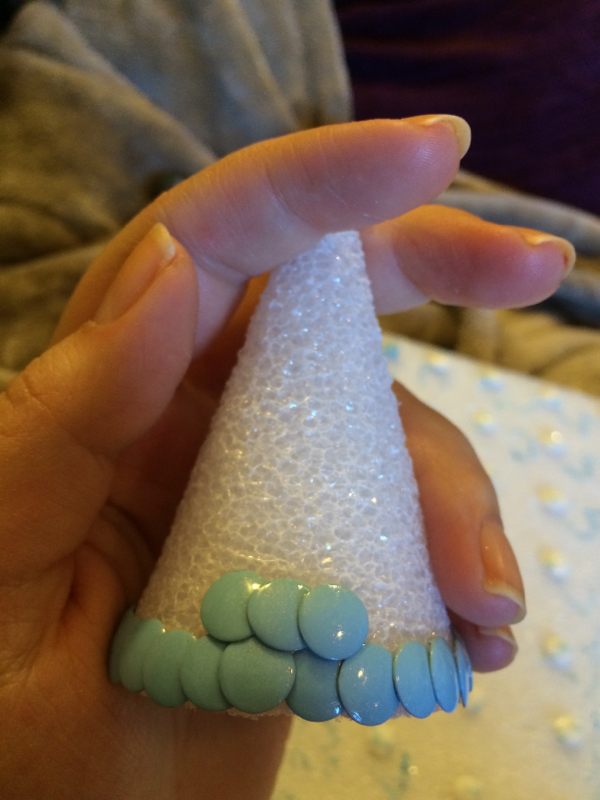
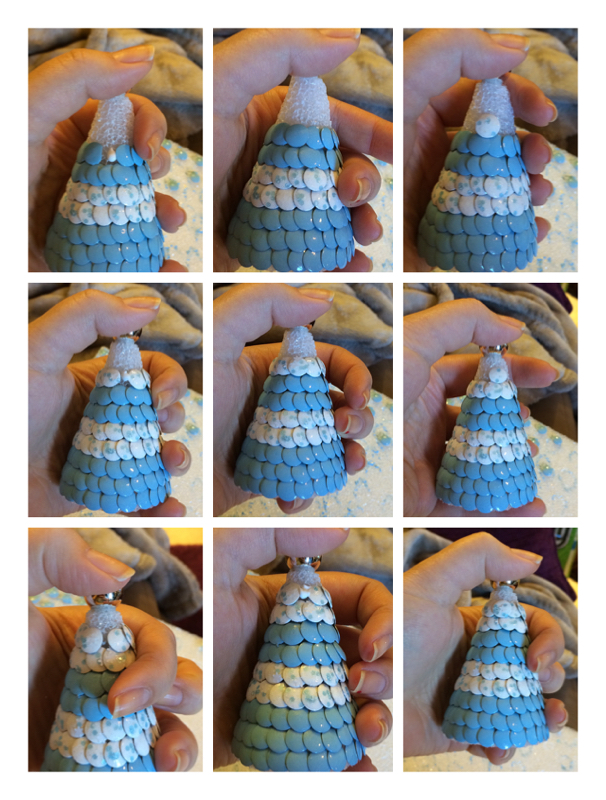
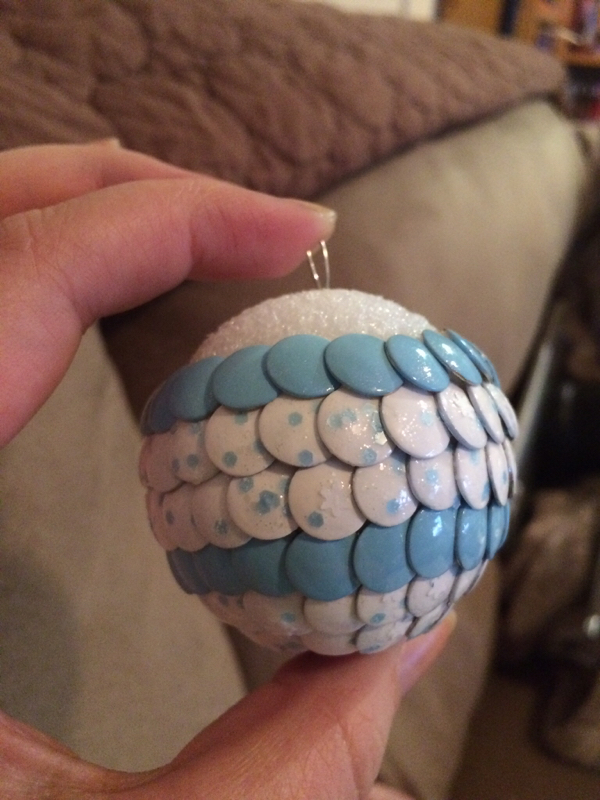
Once your tacks are ready, place the first tack in the very center of the larger end of the egg.

Picture
Picture

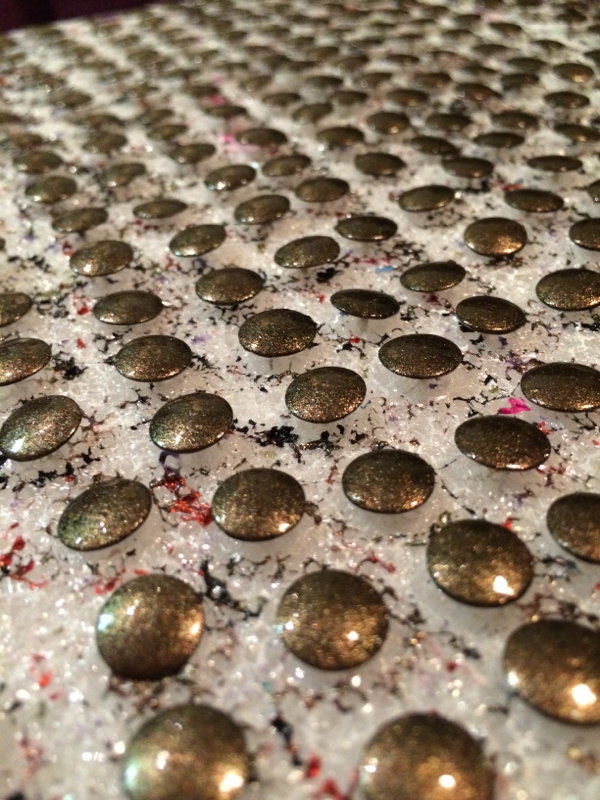
Now comes a crucial step: letting the tacks fully dry. Do not try to place the tacks until you can push on them with your fingernail without "denting" the polish. The polish will otherwise get messed up when you push the tacks together on the egg. The safest policy is to let the tacks dry over night. Remember, the more coats of polish you use, the longer the tacks will need to dry as well.

Picture

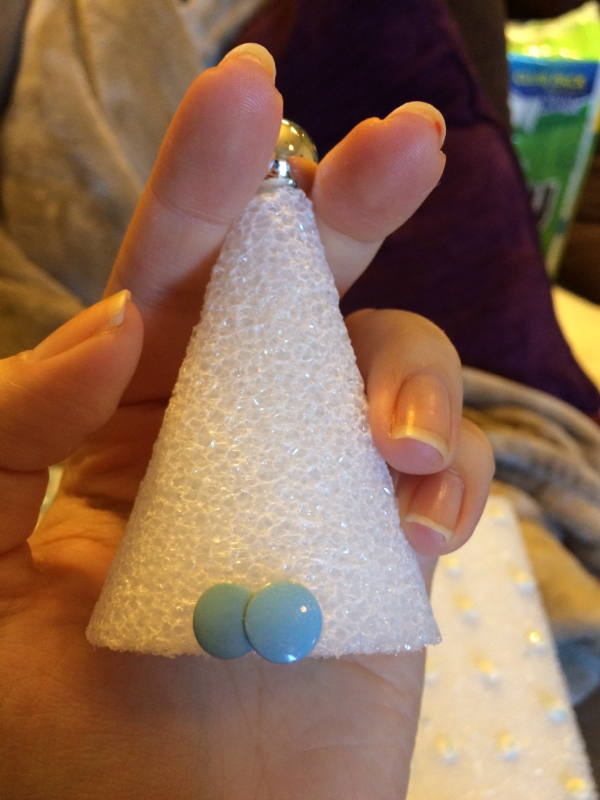
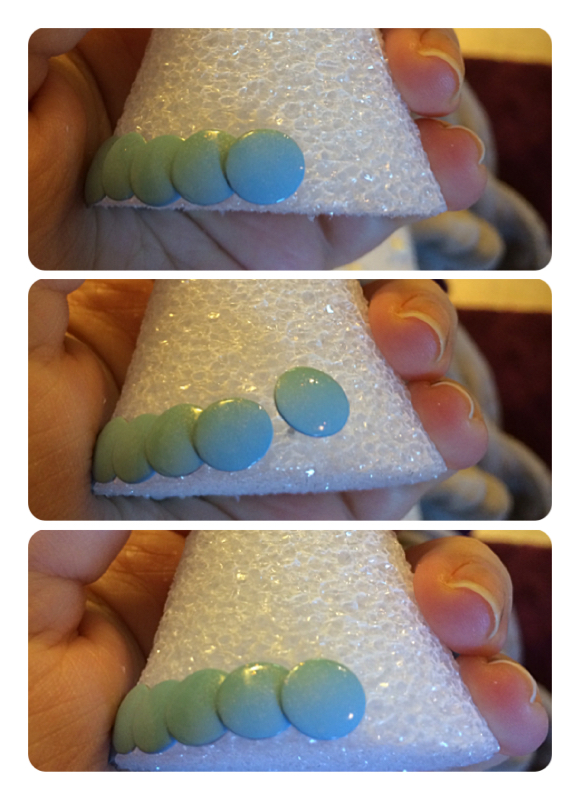
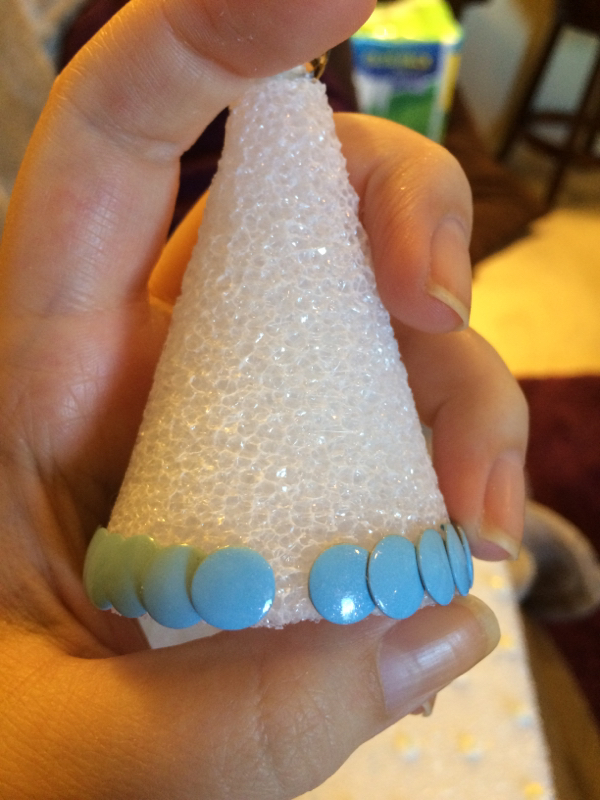
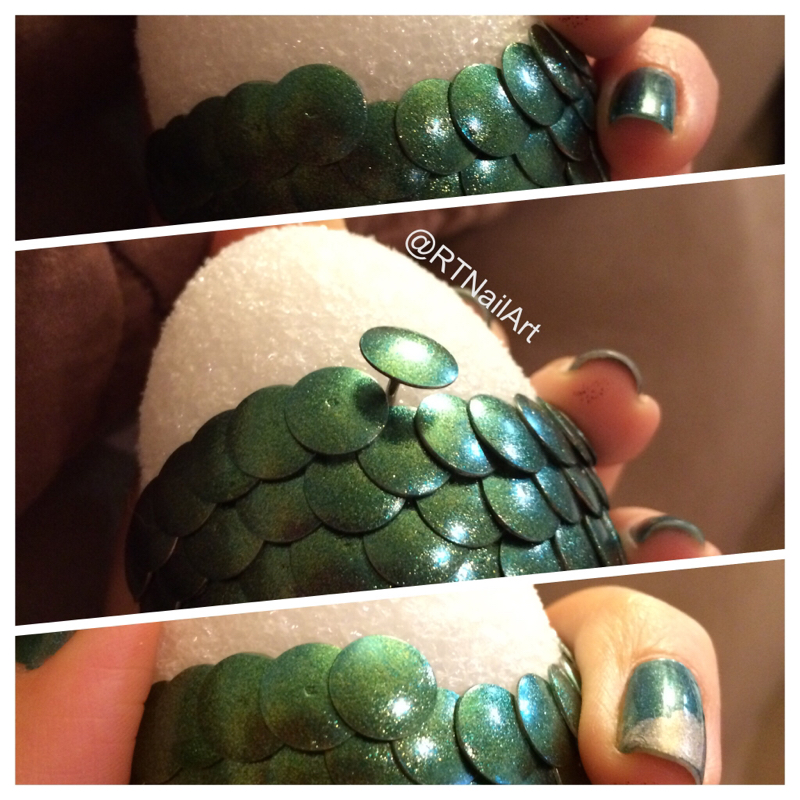
Place the next tack slightly overlapping the first. You want to create a circle around the middle tack.

Picture
Picture

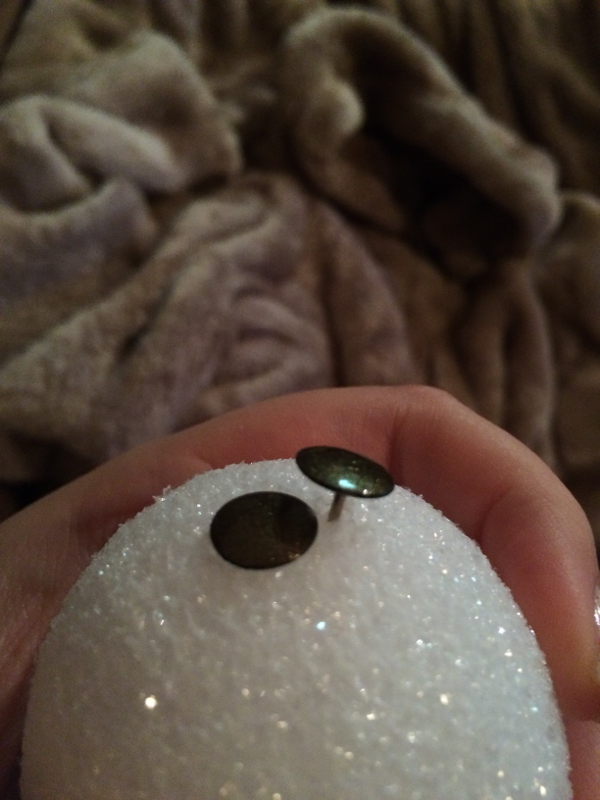
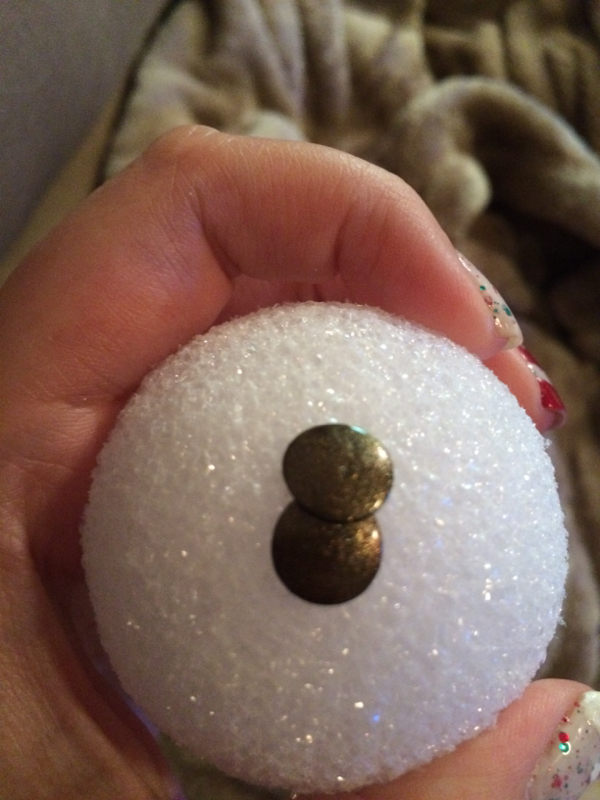
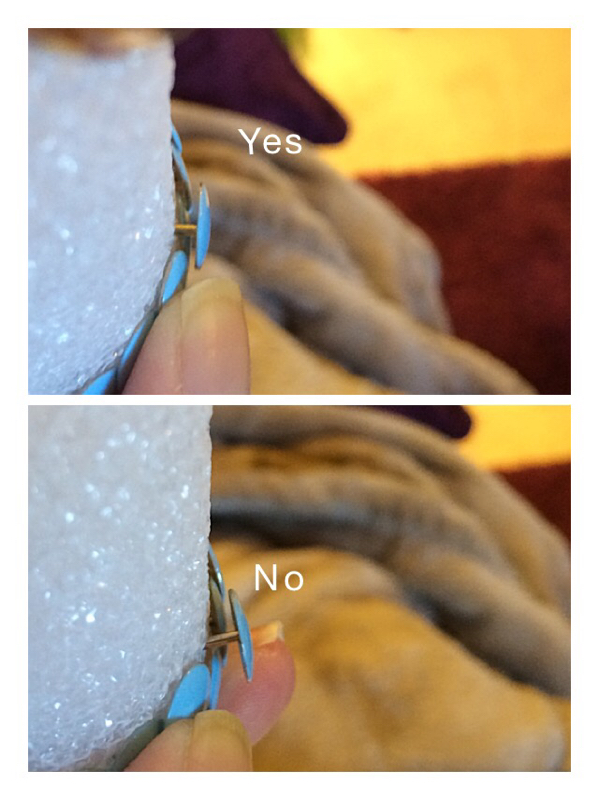
Each tack should slightly overlap the tacks "below" it and the one to the left of it.

Picture
Picture
Picture
Picture
Picture

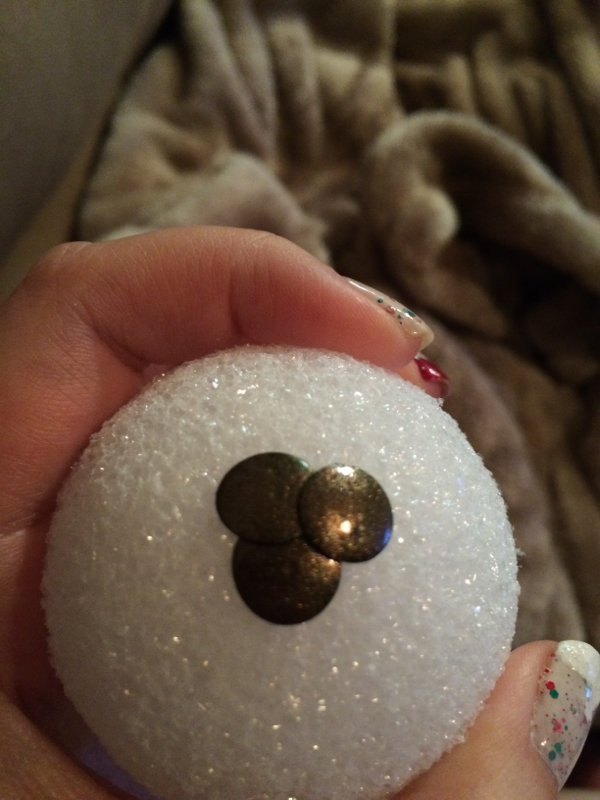
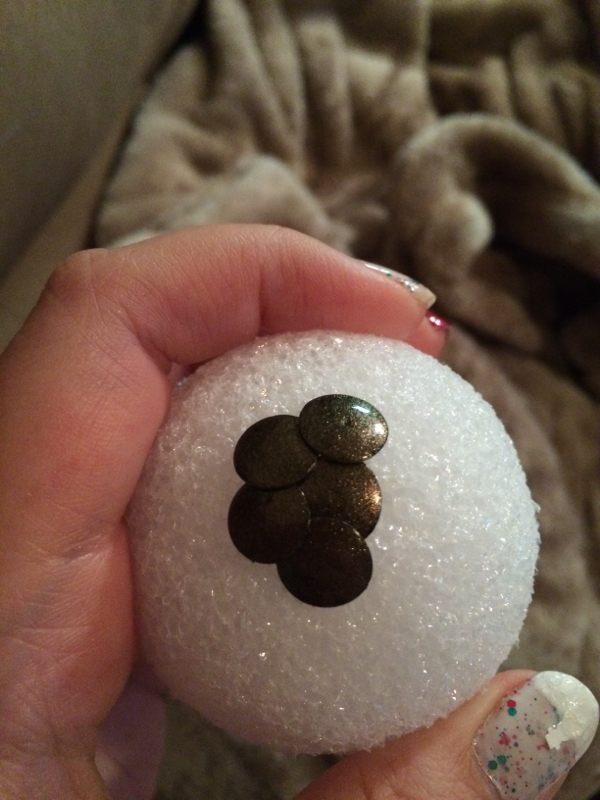
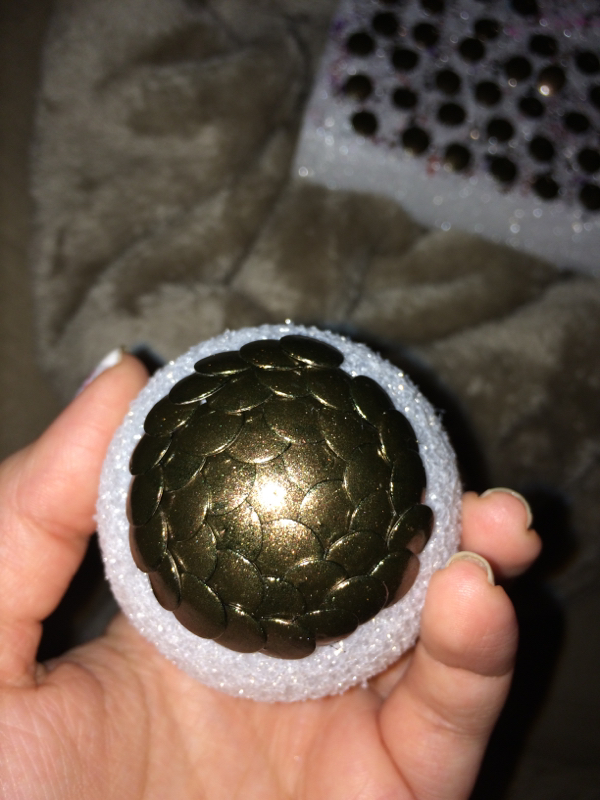
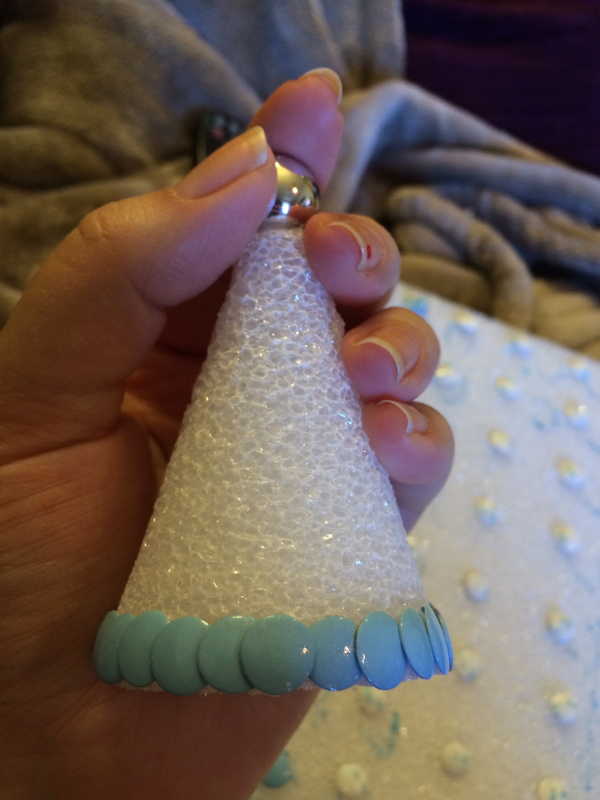
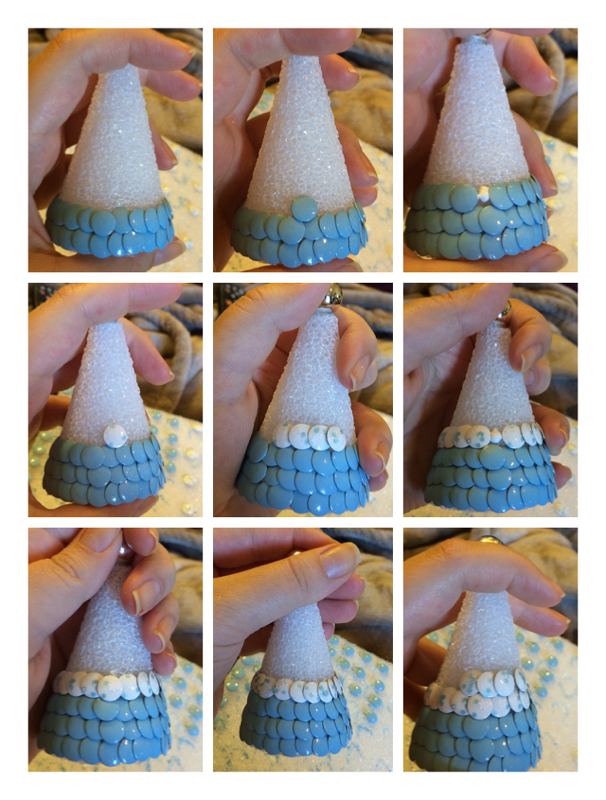
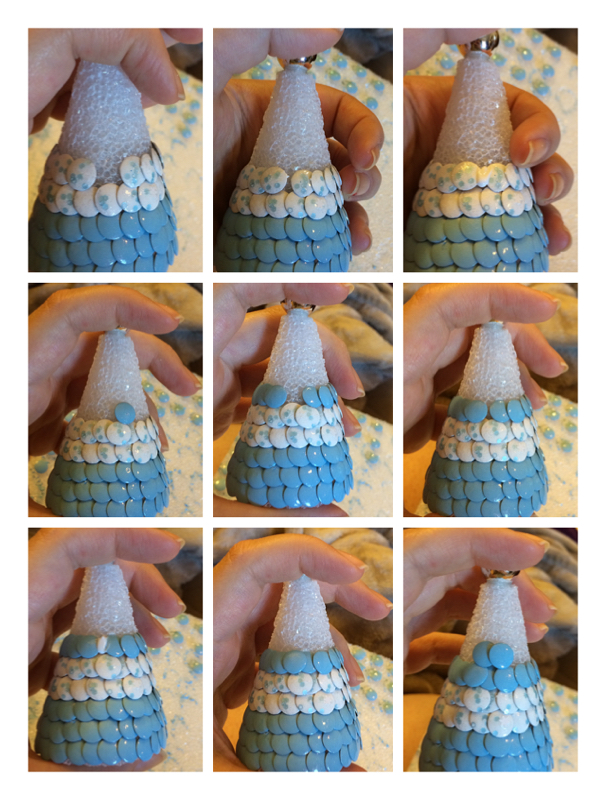
Once you get the first "ring" complete, place each subsequent tack in the "V" formed between the last tack and the ones below it.

Picture
Picture

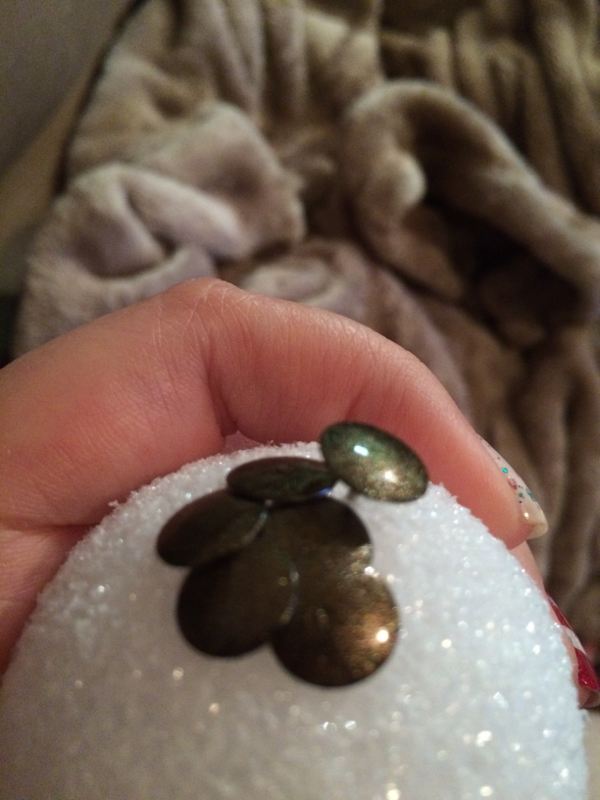
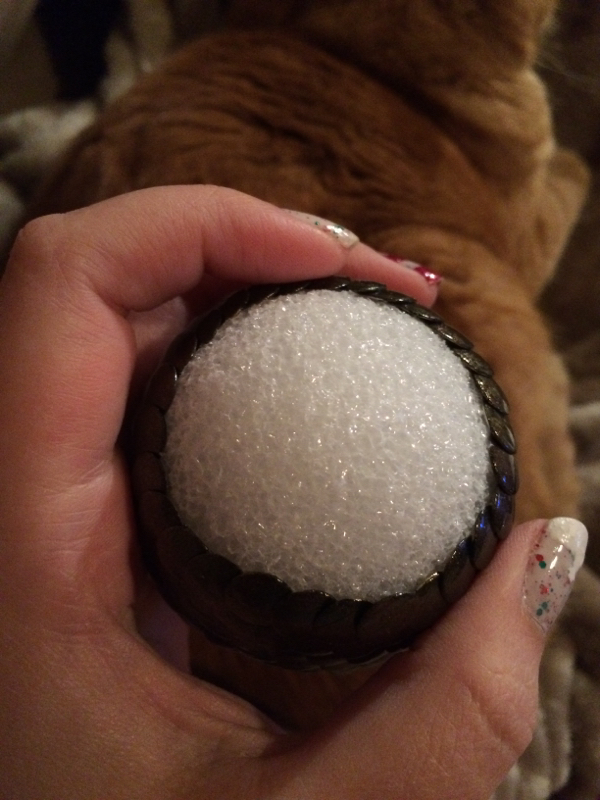
Continue on in this way until you get to the top of the egg. If your lines get a little crooked, don't worry too much. They usually straighten out by the top.

Picture
Picture
Picture
Picture
Picture
Picture
Picture
Picture
Picture
Picture
Picture
Picture
Picture
Picture

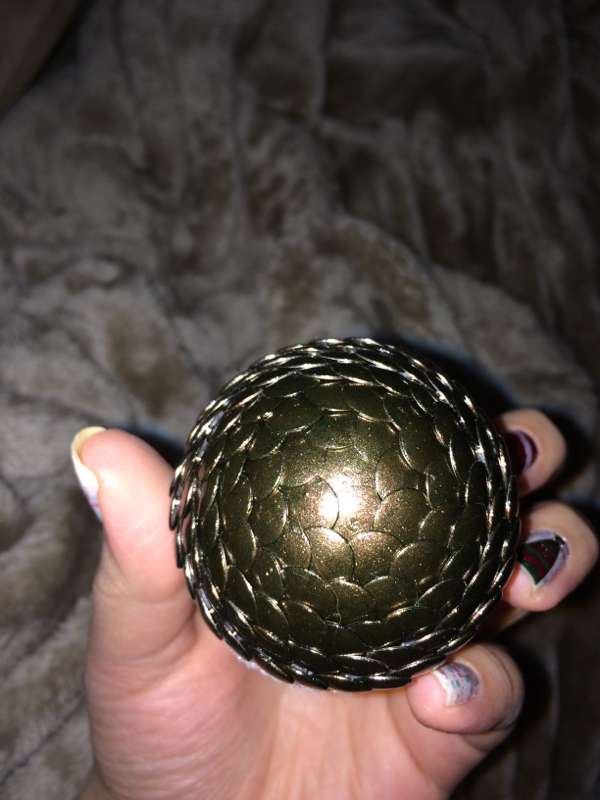
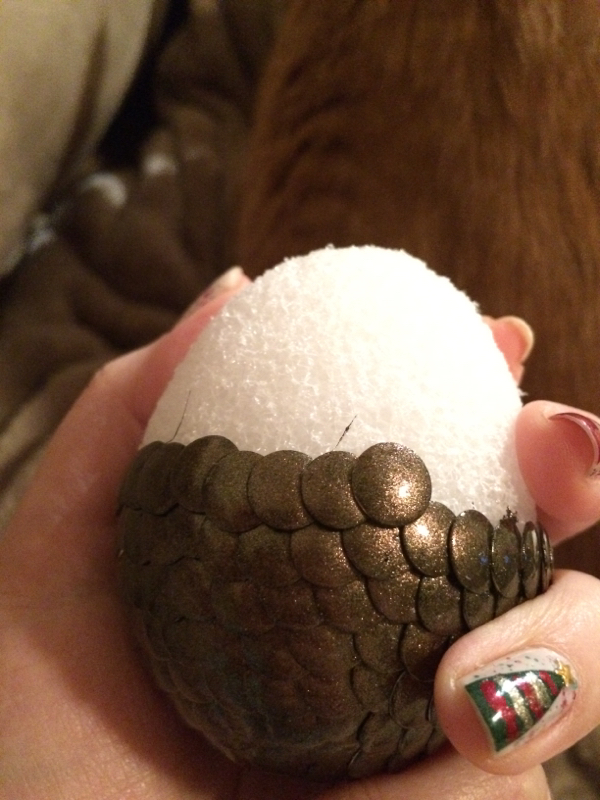
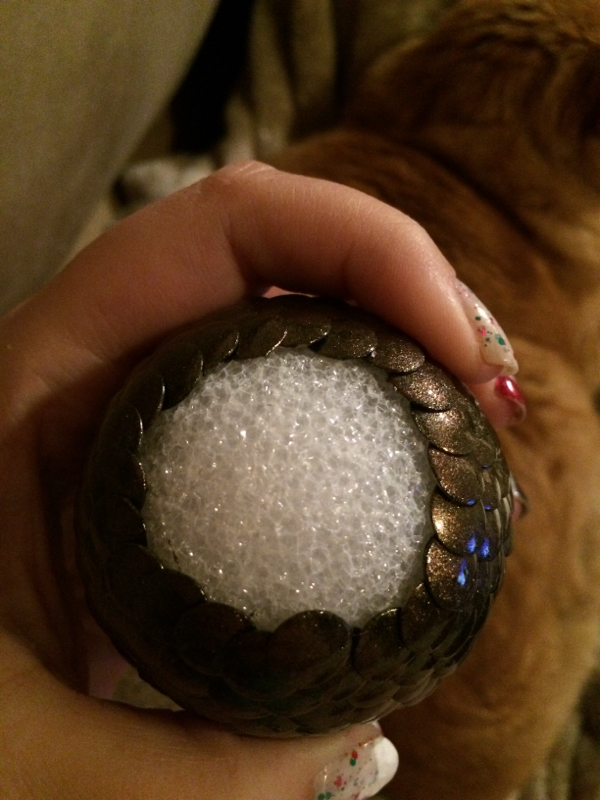
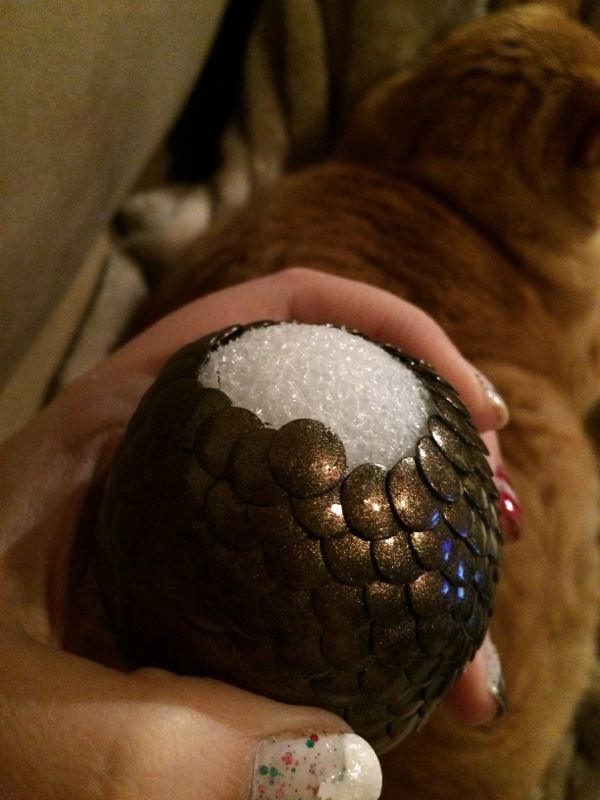
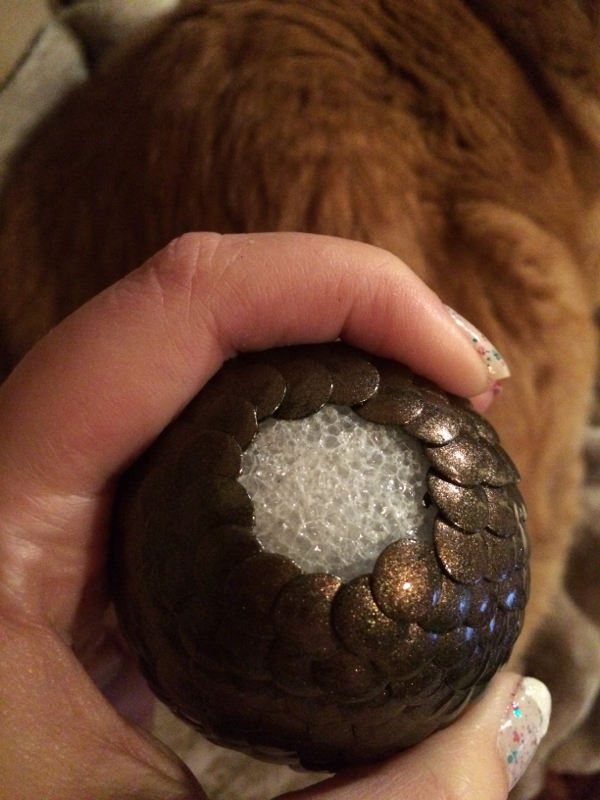
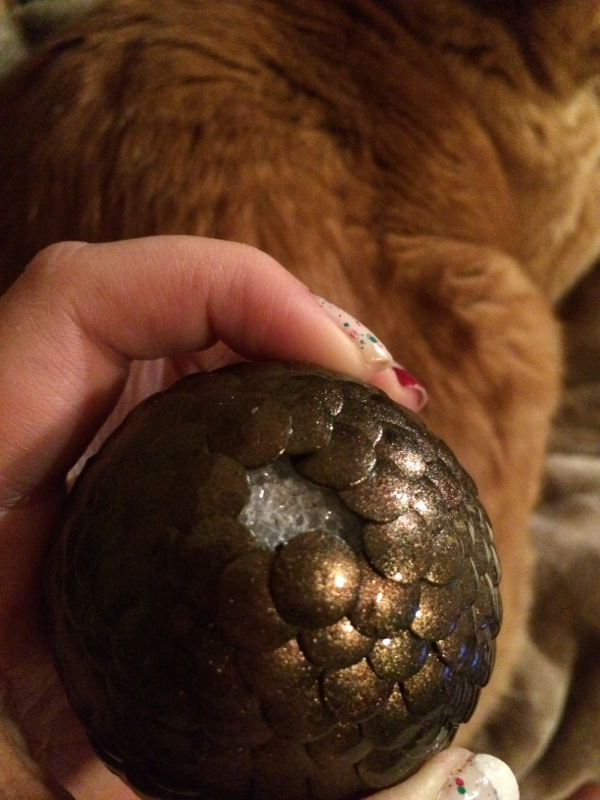
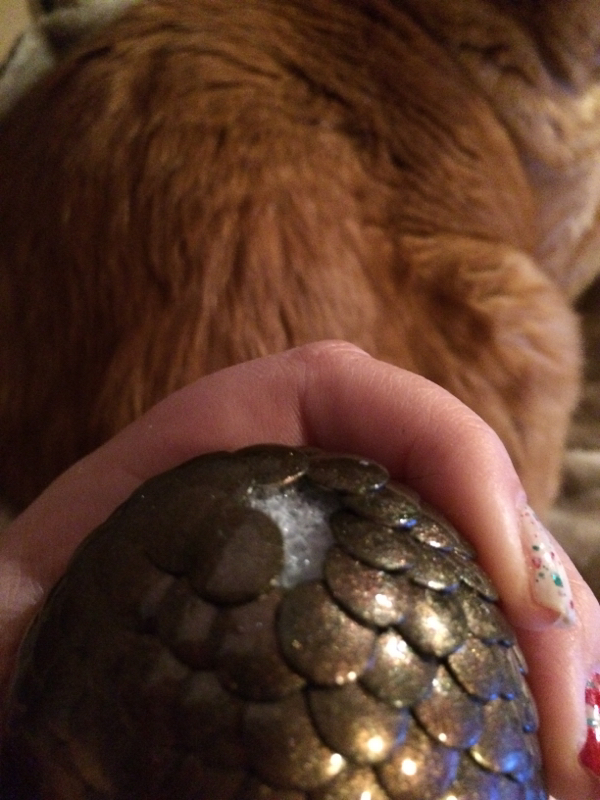
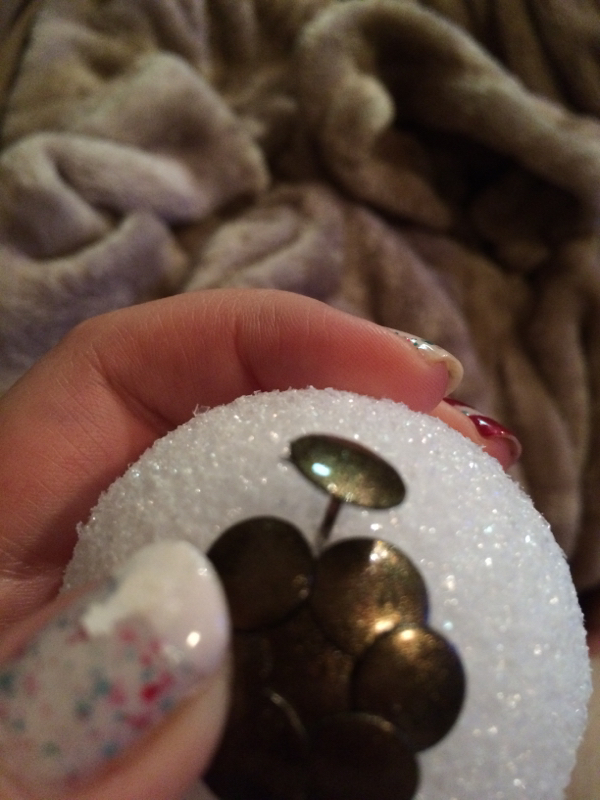
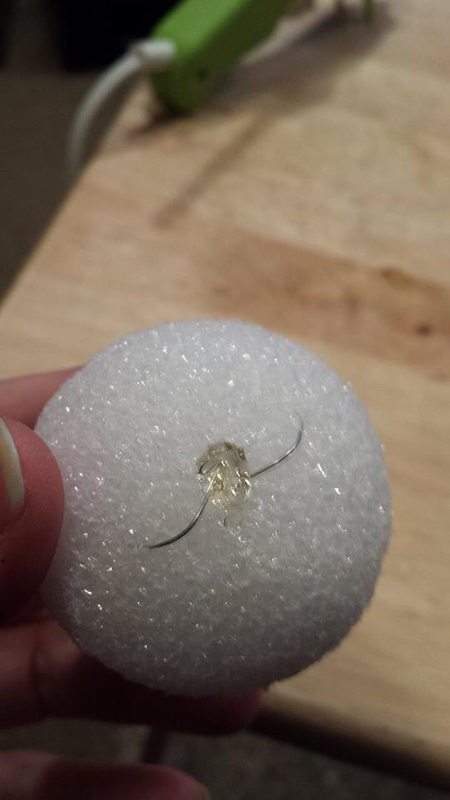
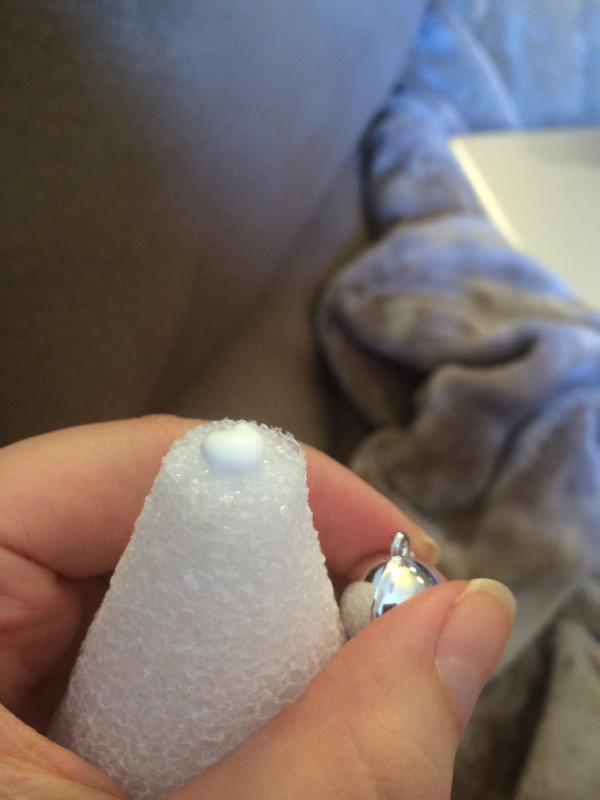
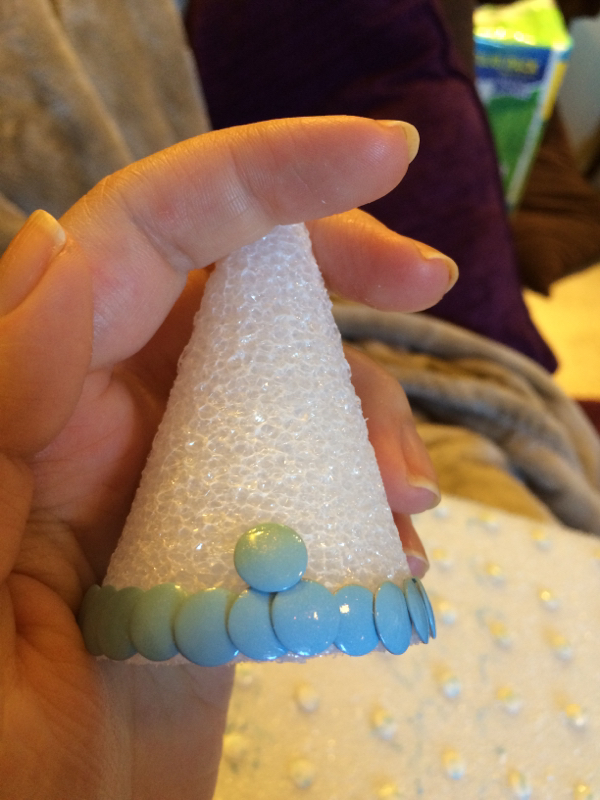
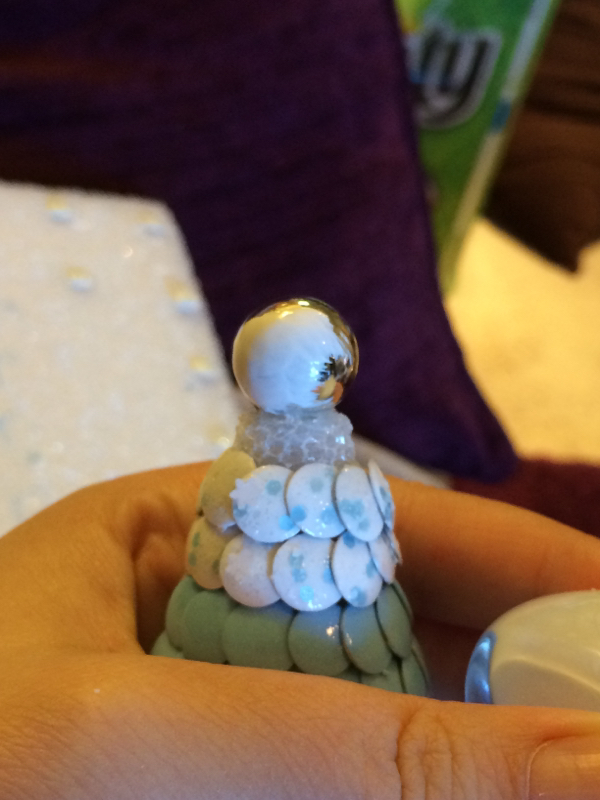
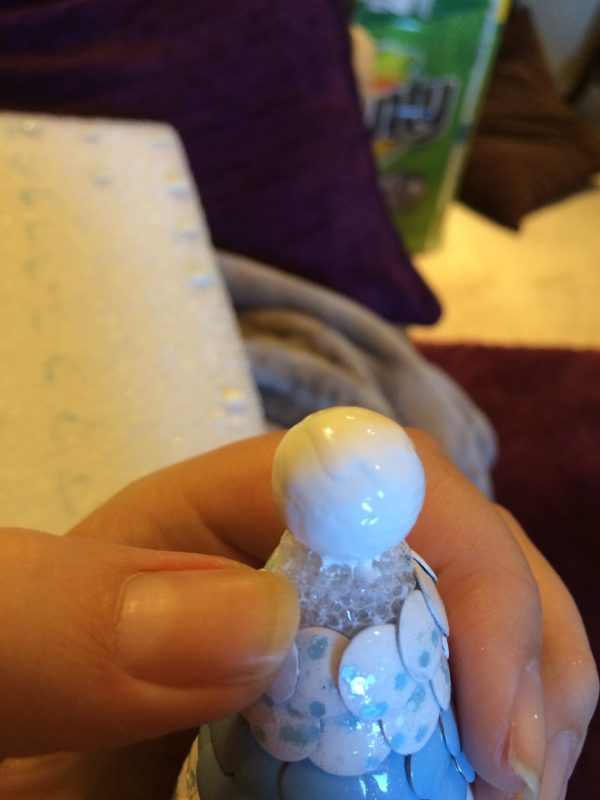
Once you're down to the last couple tacks, put glue on the egg. I used foam glue. You may want to practice placing the last couple tacks before adding the glue to make sure the top looks nice.

Picture

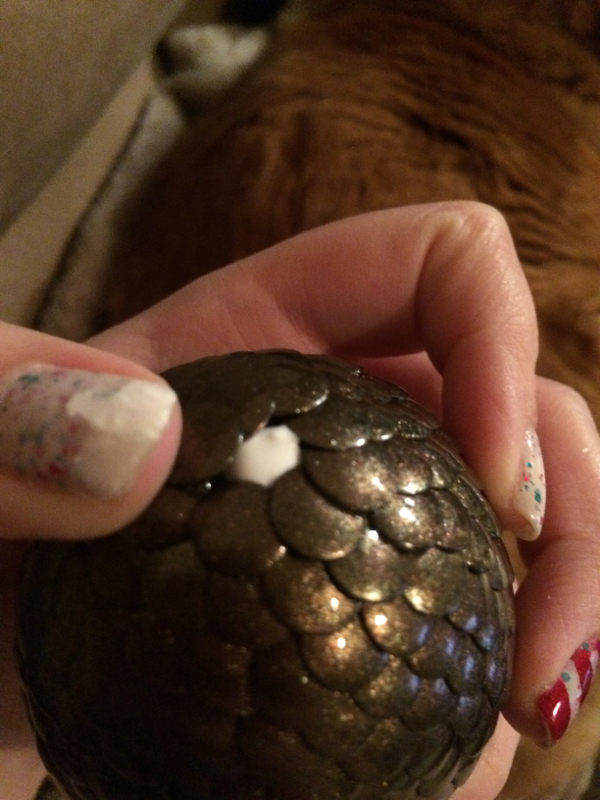
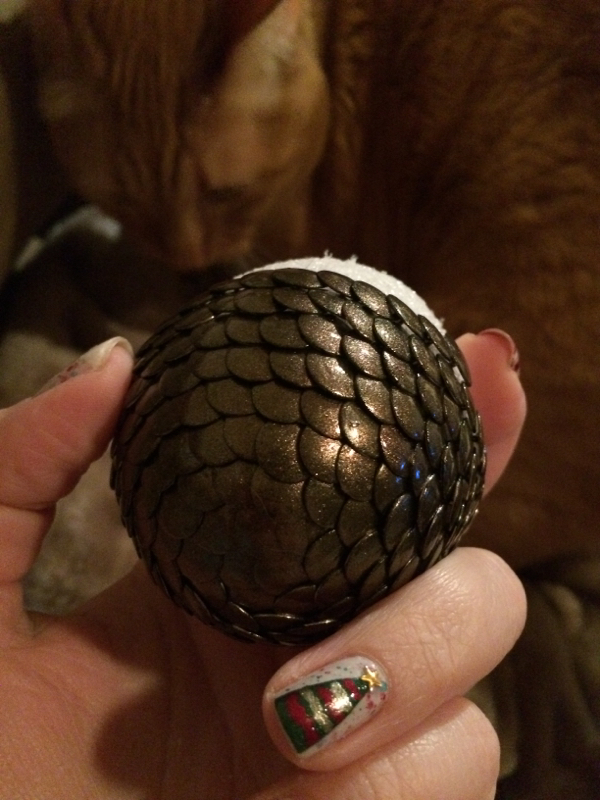
The last tack should cover up the last few tacks to hold them all in place.

Picture
Picture

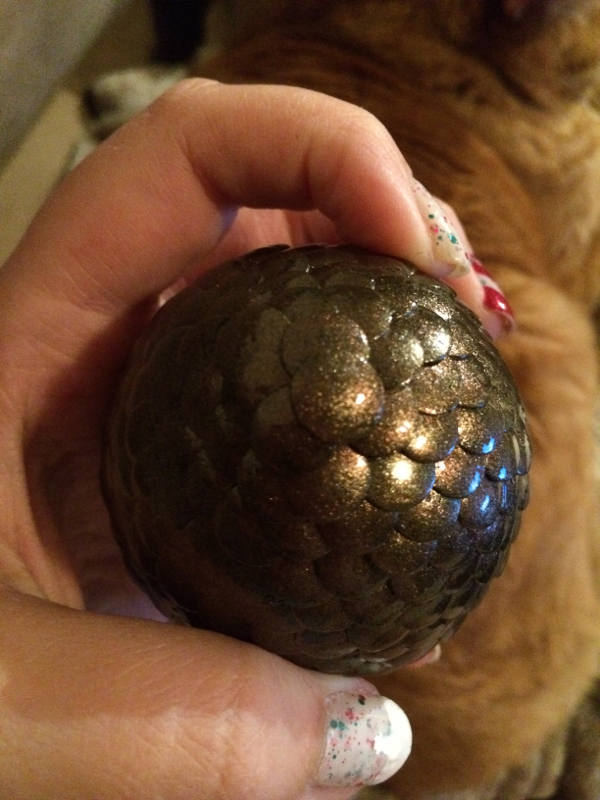
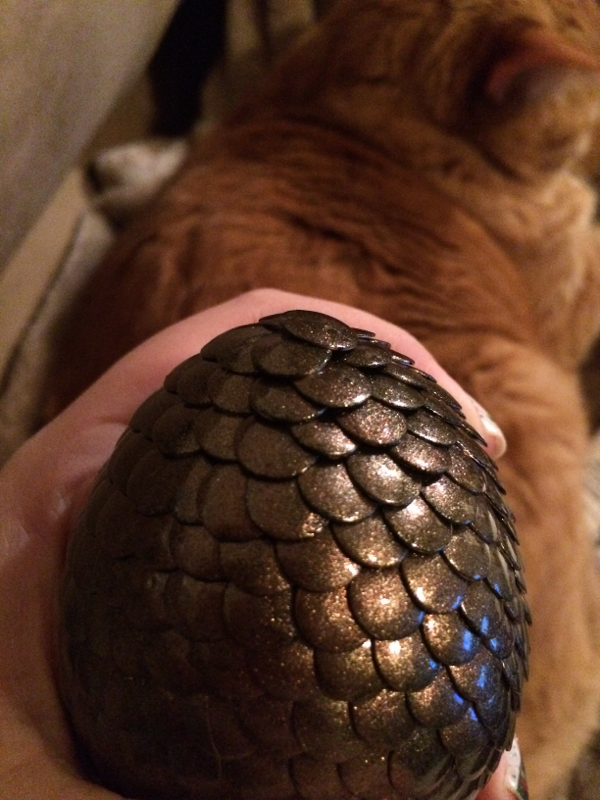
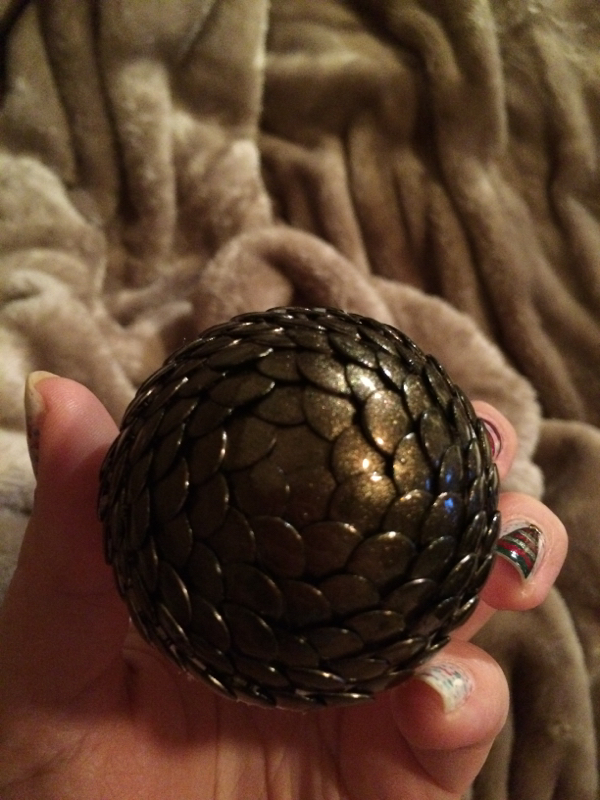
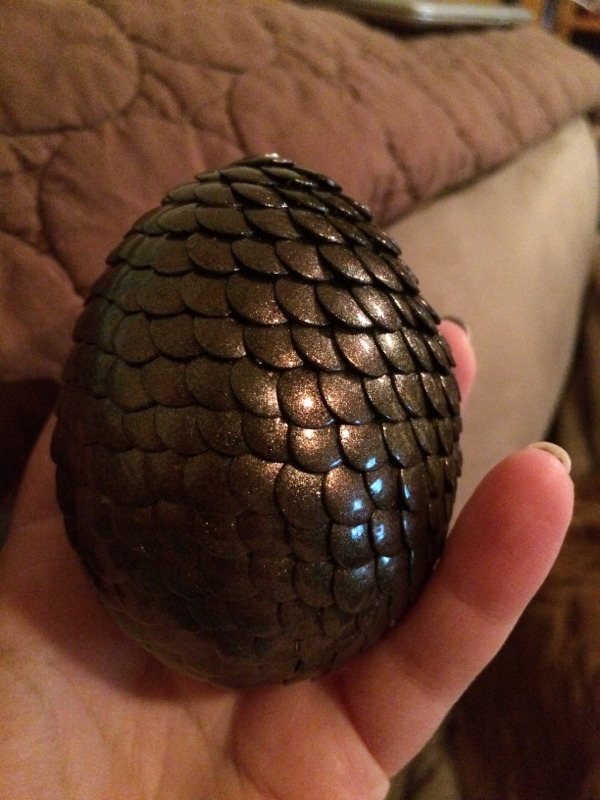
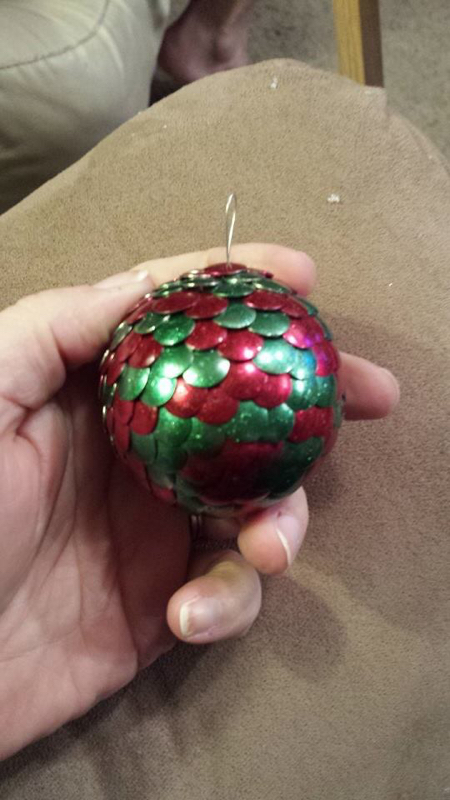
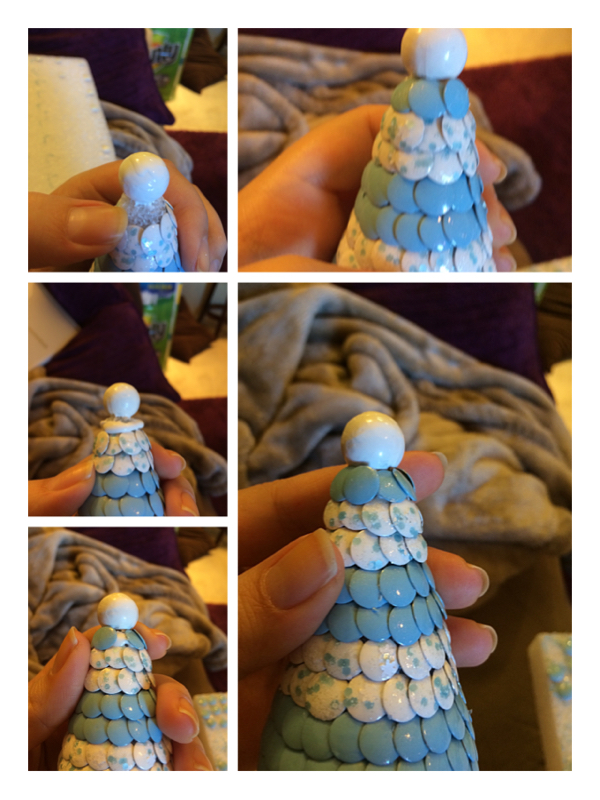
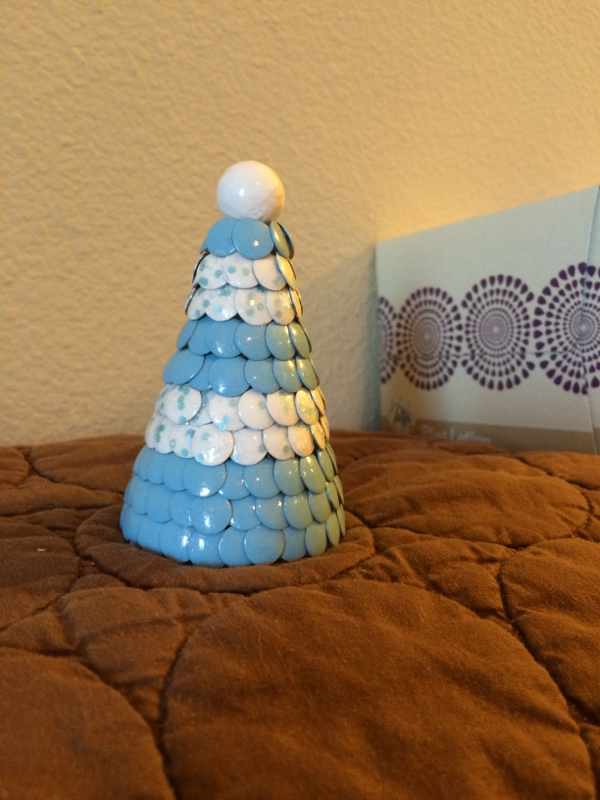
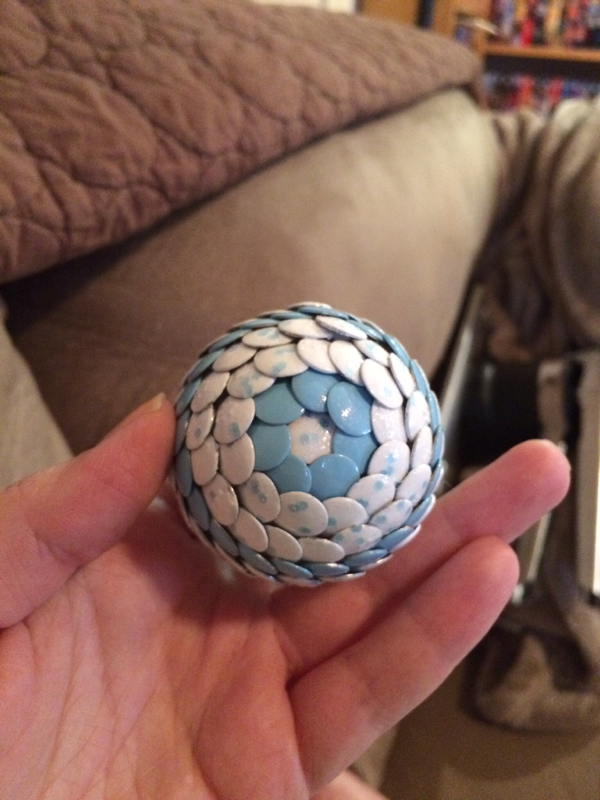
Here is the finished product.

Picture
8 Comments

Styrofoam Size Comparisons

12/15/2014

3 Comments


I just received my order from TheCraftPlace.com with one of every size styrofoam egg they make. To help others in figuring out just how big of egg they want to make, I'm going through and comparing all the nine sizes.

The sizes (as stated on their site) are from left to right:

  • 9 1/2" x 6 1/4"
  • 6 7/8" x 4 1/2"
  • 5 7/8" x 3 7/8"
  • 4 7/8" x 3 1/2"
  • 3 13/16" x 2 13/16"
  • 3 1/16" x 2 15/16"
  • 2 1/2" x 1 7/8"
  • 1 15/16" x 1 1/2"
  • 1 1/8" x 7/8"
Picture

I've measured each egg first from the top and all the way around the egg, then just the height, and finally the "waist" by measuring the circumference at the widest part.

These different measurements should help you figure out how your egg compares in size to the ones made by others as well as how many tacks you will need.

First is the 1 1/8" x 7/8" egg. This one is optimally sized for making a keychain. It takes about 50-60 tacks.

Picture
Picture
Picture
Picture

Next is the 1 15/16" x 1 1/2" egg. I need to get a better count of the tacks needed for this one. Current estimate is about 150-170.

Picture
Picture

2 1/2" x 1 7/8" egg. Tack estimate needed.

Picture
Picture
Picture

3 1/16" x 2 15/16". Tack estimate needed.

Picture
Picture
Picture

3 13/16" x 2 13/16". Tack estimate needed.

Picture
Picture
Picture

4 7/8" x 3 1/2" egg. This egg takes an estimated 900 tacks.

Picture
Picture
Picture

5 7/8" x 3 7/8" egg. This one takes about 1,150-1,250 tacks.

Picture
Picture
Picture

6 7/8" x 4 1/2" egg. Tack estimate needed.

Picture
Picture
Picture

9 1/2" x 6 1/4" egg. Tack estimate pending me finishing this monster.

Picture
Picture
Picture
3 Comments

How to Create Hanging Ornaments/Eggs

12/3/2014

0 Comments

 
This guide explains how to add a hanging wire to your styrofoam shape.


These are the types of wire I use. I also use a glue gun

Picture

First I take a thick flower wire and stick it through the egg/ball

Picture
Second, I take a thin flower wire and fold it in half.
Picture
I put this wire into the hole, folded end first.
Picture
I trim the ends a little so they aren't so long. Then I fold them over to the sides and back into the egg/ball.
Picture
Picture
Then push them all the way into the egg/ball so it's flush with the foam.
Picture
Then I put a little bit of glue on the bottom, and put on a tack.
Picture
Picture
This is one of my finished ornaments.
Picture
Post by Jessica Hunt
0 Comments

Small Tree Tutorial

11/27/2014

1 Comment


To make a small tree, you will need a small styrofoam cone, glue, a mini ornament for a topper, your desired nail polish colors, something to stick the tacks into while painting, and about 200 thumb tacks.

Here are all of the materials I used.

Picture
The first thing you'll need to do is put the topper on the cone. This step should preferably be done the night before assembling the tree to allow for it to dry completely.

Place a big dot of glue onto the top of the cone.

Picture

Place the ornament with the hanging loop down. Press down until the loop goes into the styrofoam. This will help secure the topper.

Picture
Picture
Set your cone aside to dry. In the meantime, you can start painting your tacks.

I placed my tacks into a styrofoam board. How closely I place them depends on what method I'm using to paint them. Since I used glitter placement for this tree, they're spaced much further apart than normal for me.

Picture
I painted each blue tack with two coats of Bonna Blue from Fresh Paint. This polish is very opaque and thick, so it does a great job coating the tacks. Sinful Colors Cinderella is a very thin and shimmery polish, so I couldn't use it by itself. I added one coat of Cinderella over my base.

For the white tacks, I used two coats of Funky Fingers Gesso. This again is another thick, opaque polish that makes a great base. After those layers dried, I used a makeup sponge to place Funky Fingers Else onto the tacks. I followed that up with another quick coat of Else using the brush.

You want to make sure to let your tacks dry a little between coats, especially when doing glitter placement. If you're painting a large number of tacks at once, the first ones should be ready to paint again by the time you've finished painting all of them with one coat. Go here for more information on glitter placement.

I also used Fresh Paint Finished (which I forgot to include in the picture) for a clear top coat over the tacks.

Picture
Once the tacks are painted comes the hard part. Waiting. You need to let them dry several hours before placing them onto the cone. You may want to rush this step, but placing the tacks too soon can ruin the entire project.

Let your tacks sit until the polish doesn't dent when you push into it with your finger nail. Even if they seen dry, if they still dent a little, they will definitely dent during placement.
Assuming you've waiting for your topper and tacks to dry, now you can start on the actual tree.

For a tree, you want to line the tacks in rows. Start at the very bottom with your first color.

Picture

The tacks barely overlap, unlike an egg where you overlap them very closely.

Picture

You want to place each tack as closely in line vertically with the one before it as possibly. I move slightly over from the edge of the previous one and try to place the point of my next tack at about the middle of the previous one.

Picture

When doing rows (as opposed to the close swirl of the tacks on an egg) you want to be very careful placing the last tack on a row. It should still be right in line with the other tacks in the row, but it will have no tacks overlapping it horizontally.

To help hold this tack in place, I put a dot of glue.

Picture
Picture
Picture
Picture
When starting the next row, you want to start in about the same area where the last row ended. Since the last tack of each row overlaps two tacks, it sticks up a little higher. This creates a sort of "seam" on the back of the tree. 


This next row should just barely overlap the one before it.

Picture

If your lines aren't perfect, don't worry. Try to keep to the same line even if one of two tacks don't fit it perfectly.

Picture
When placing the tacks, you want to be straight on. Tilting the tack will make your lines not lay correctly.
Picture
Using these same methods, keep placing each row.
Picture
Picture
Picture
Before you get to the last row of tacks, you'll want to stop and paint your topper. I used two coats of Funky Fingers Gesso and a clear top coat.

Make sure it dries before you place the last rows of tacks. Otherwise the polish will dent.

Picture
Picture
When placing the very last row of tacks, I glue the entire row.

Try to gauge how well your tacks will fit for the last row. If it seems like you don't have enough space, make the second to last row overlap the row before a little more.

Picture
The finished product is a cute little Frozen inspired tree.
Picture
Post by RTNailArt
1 Comment

Glitter Placement

11/26/2014

1 Comment


Chunky glitter polish can make a beautiful egg, but since each tack is so small it can be hard to get glitter from your brush onto the tack.

I've been wanting to use this Frozen inspired polish from Five Below. This is Elsa.

Picture

Since this is a clear-base polish, I started by painting my tacks with a base coat. Some of my tacks will be blue and the others white.

Picture

One coat didn't completely hide the silver of the tacks. So I did one more coat.

Picture

I let the tacks dry awhile so I wouldn't smudge the base coat when placing my glitter.

Next I painted the glitter polish directly onto a makeup sponge. This soaks up the extra clear polish so you can put more glitter on the tack than painting the tack directly.

Picture

Once the glitter is on the sponge, lightly dab it into the tacks.

Picture

I followed up the sponge with a light coat of the polish with the brush to get a nice coating over th glitter then followed up with a top coat.

Picture

Finally, I assembled it on a styrofoam ball to make an ornament.

Picture
Picture
Post by @RTNailArt

1 Comment

How to Overlap Your Tacks

11/22/2014

1 Comment


When placing tacks into the styrofoam, you want to overlap them to both hold the previous tacks in place and to hide the underlying styrofoam.

When I place my tacks, I put the next tack in the very corner of the "V" formed by the previous tacks.

Picture
Post by @RTNailArt

1 Comment

    Description

    Tutorials and images of DIY nail polish dragon eggs and related crafts.

    Archives

    December 2014
    November 2014

    Categories

    All
    Full Tutorial
    Hanging
    Ornaments
    Overlapping
    Placement
    Tree

    RSS Feed


Powered by Create your own unique website with customizable templates.